Changelog
Follow up on the latest improvements and updates.
RSS
improved
fixed
Invoicing
Invoices: Bug fixes
We Squashed Some Bugs!
Bug
: When payment schedules and partial payments are involved with the combination of tips , sometimes the payment fails due to a calculation issueSolution:
Fixed! Now irrespective of the combination payments should flow in smoothly ! ____________________________________________________________________________________________________
Bug:
For a invoice, where adding a product on the fly it picked up product name instead of the price name in invoice lineItem!Solution
: Fixed! Now we have added appropriate guardrails in order to prevent this issue ____________________________________________________________________________________________________
Bug
: Earlier we had restricted the email configuration's length for en email to 40 characters in the UI which caused issues for some client !Solution
: Fixed! This limit is now enhanced and client's won't face this issue anymore !new
E-Commerce Stores
Inventory Management page for E-commerce stores
About:
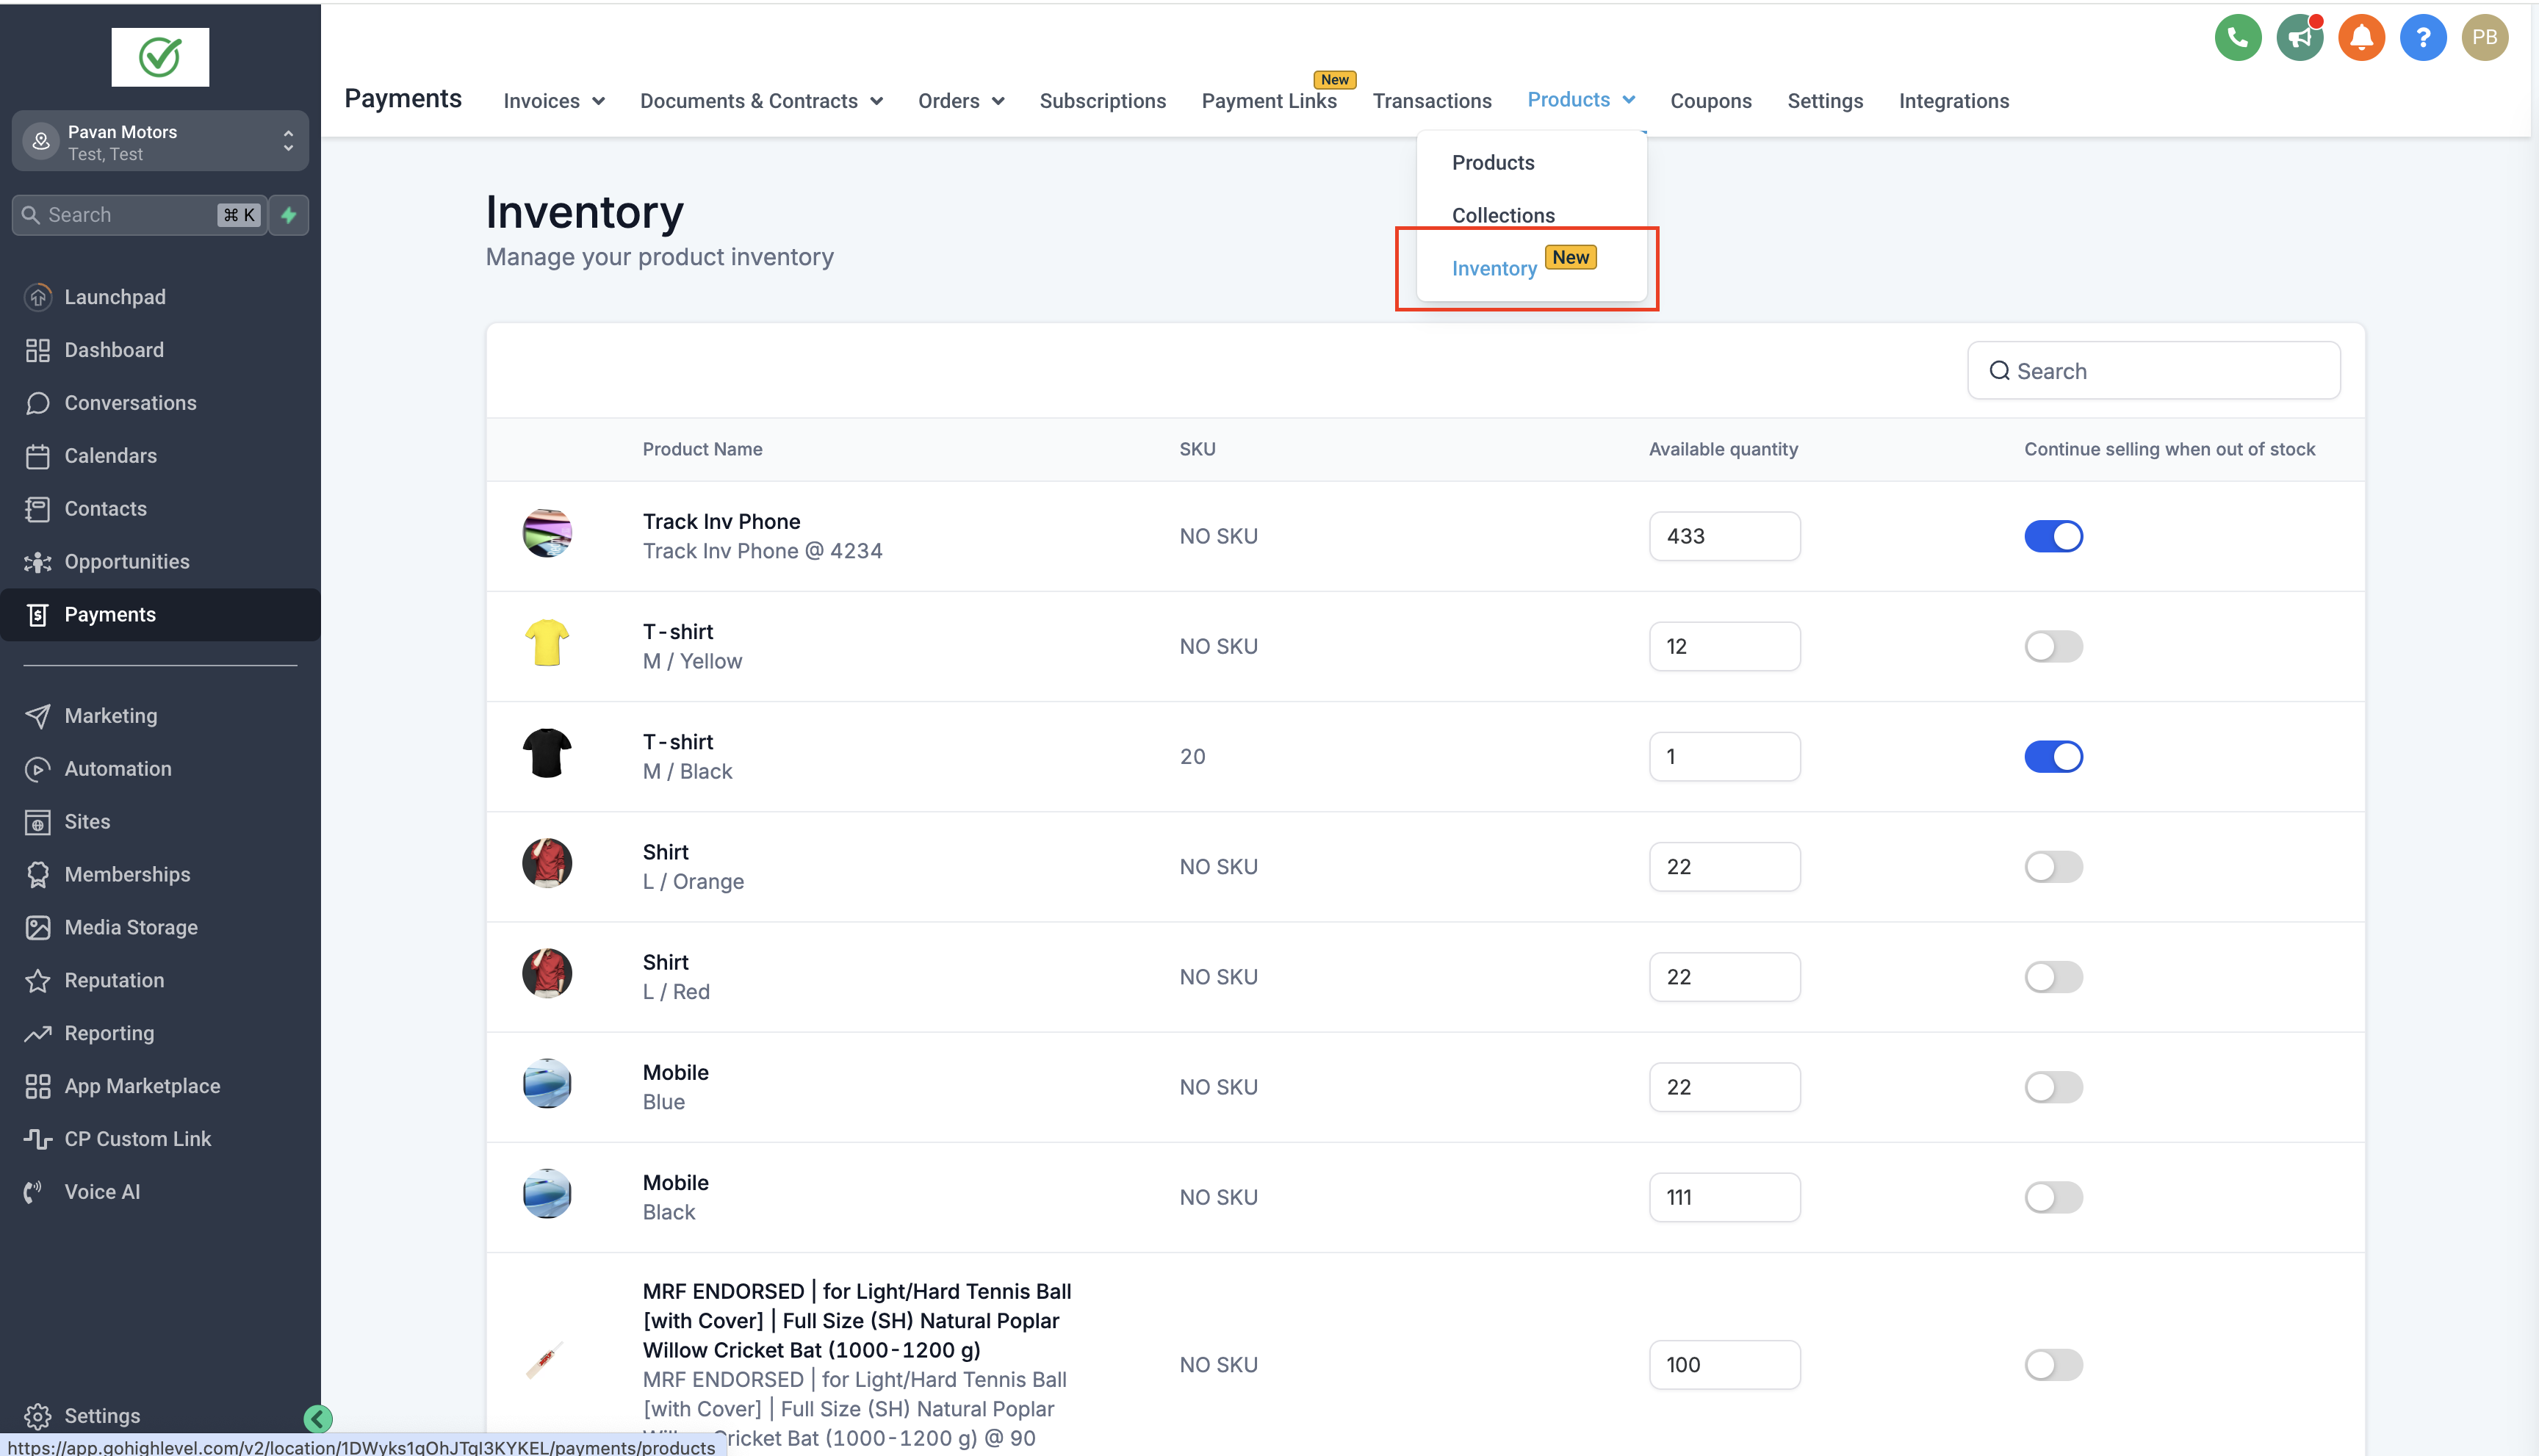
Store owners now have a streamlined way to manage their inventory through the new Inventory Management page. This feature allows updates to product quantities and the option to "Continue selling when out of stock." It also includes enhanced search functionality.
How to use:
- Store owners can access the Inventory Management page at: Payments > Products dropdown > Inventory.
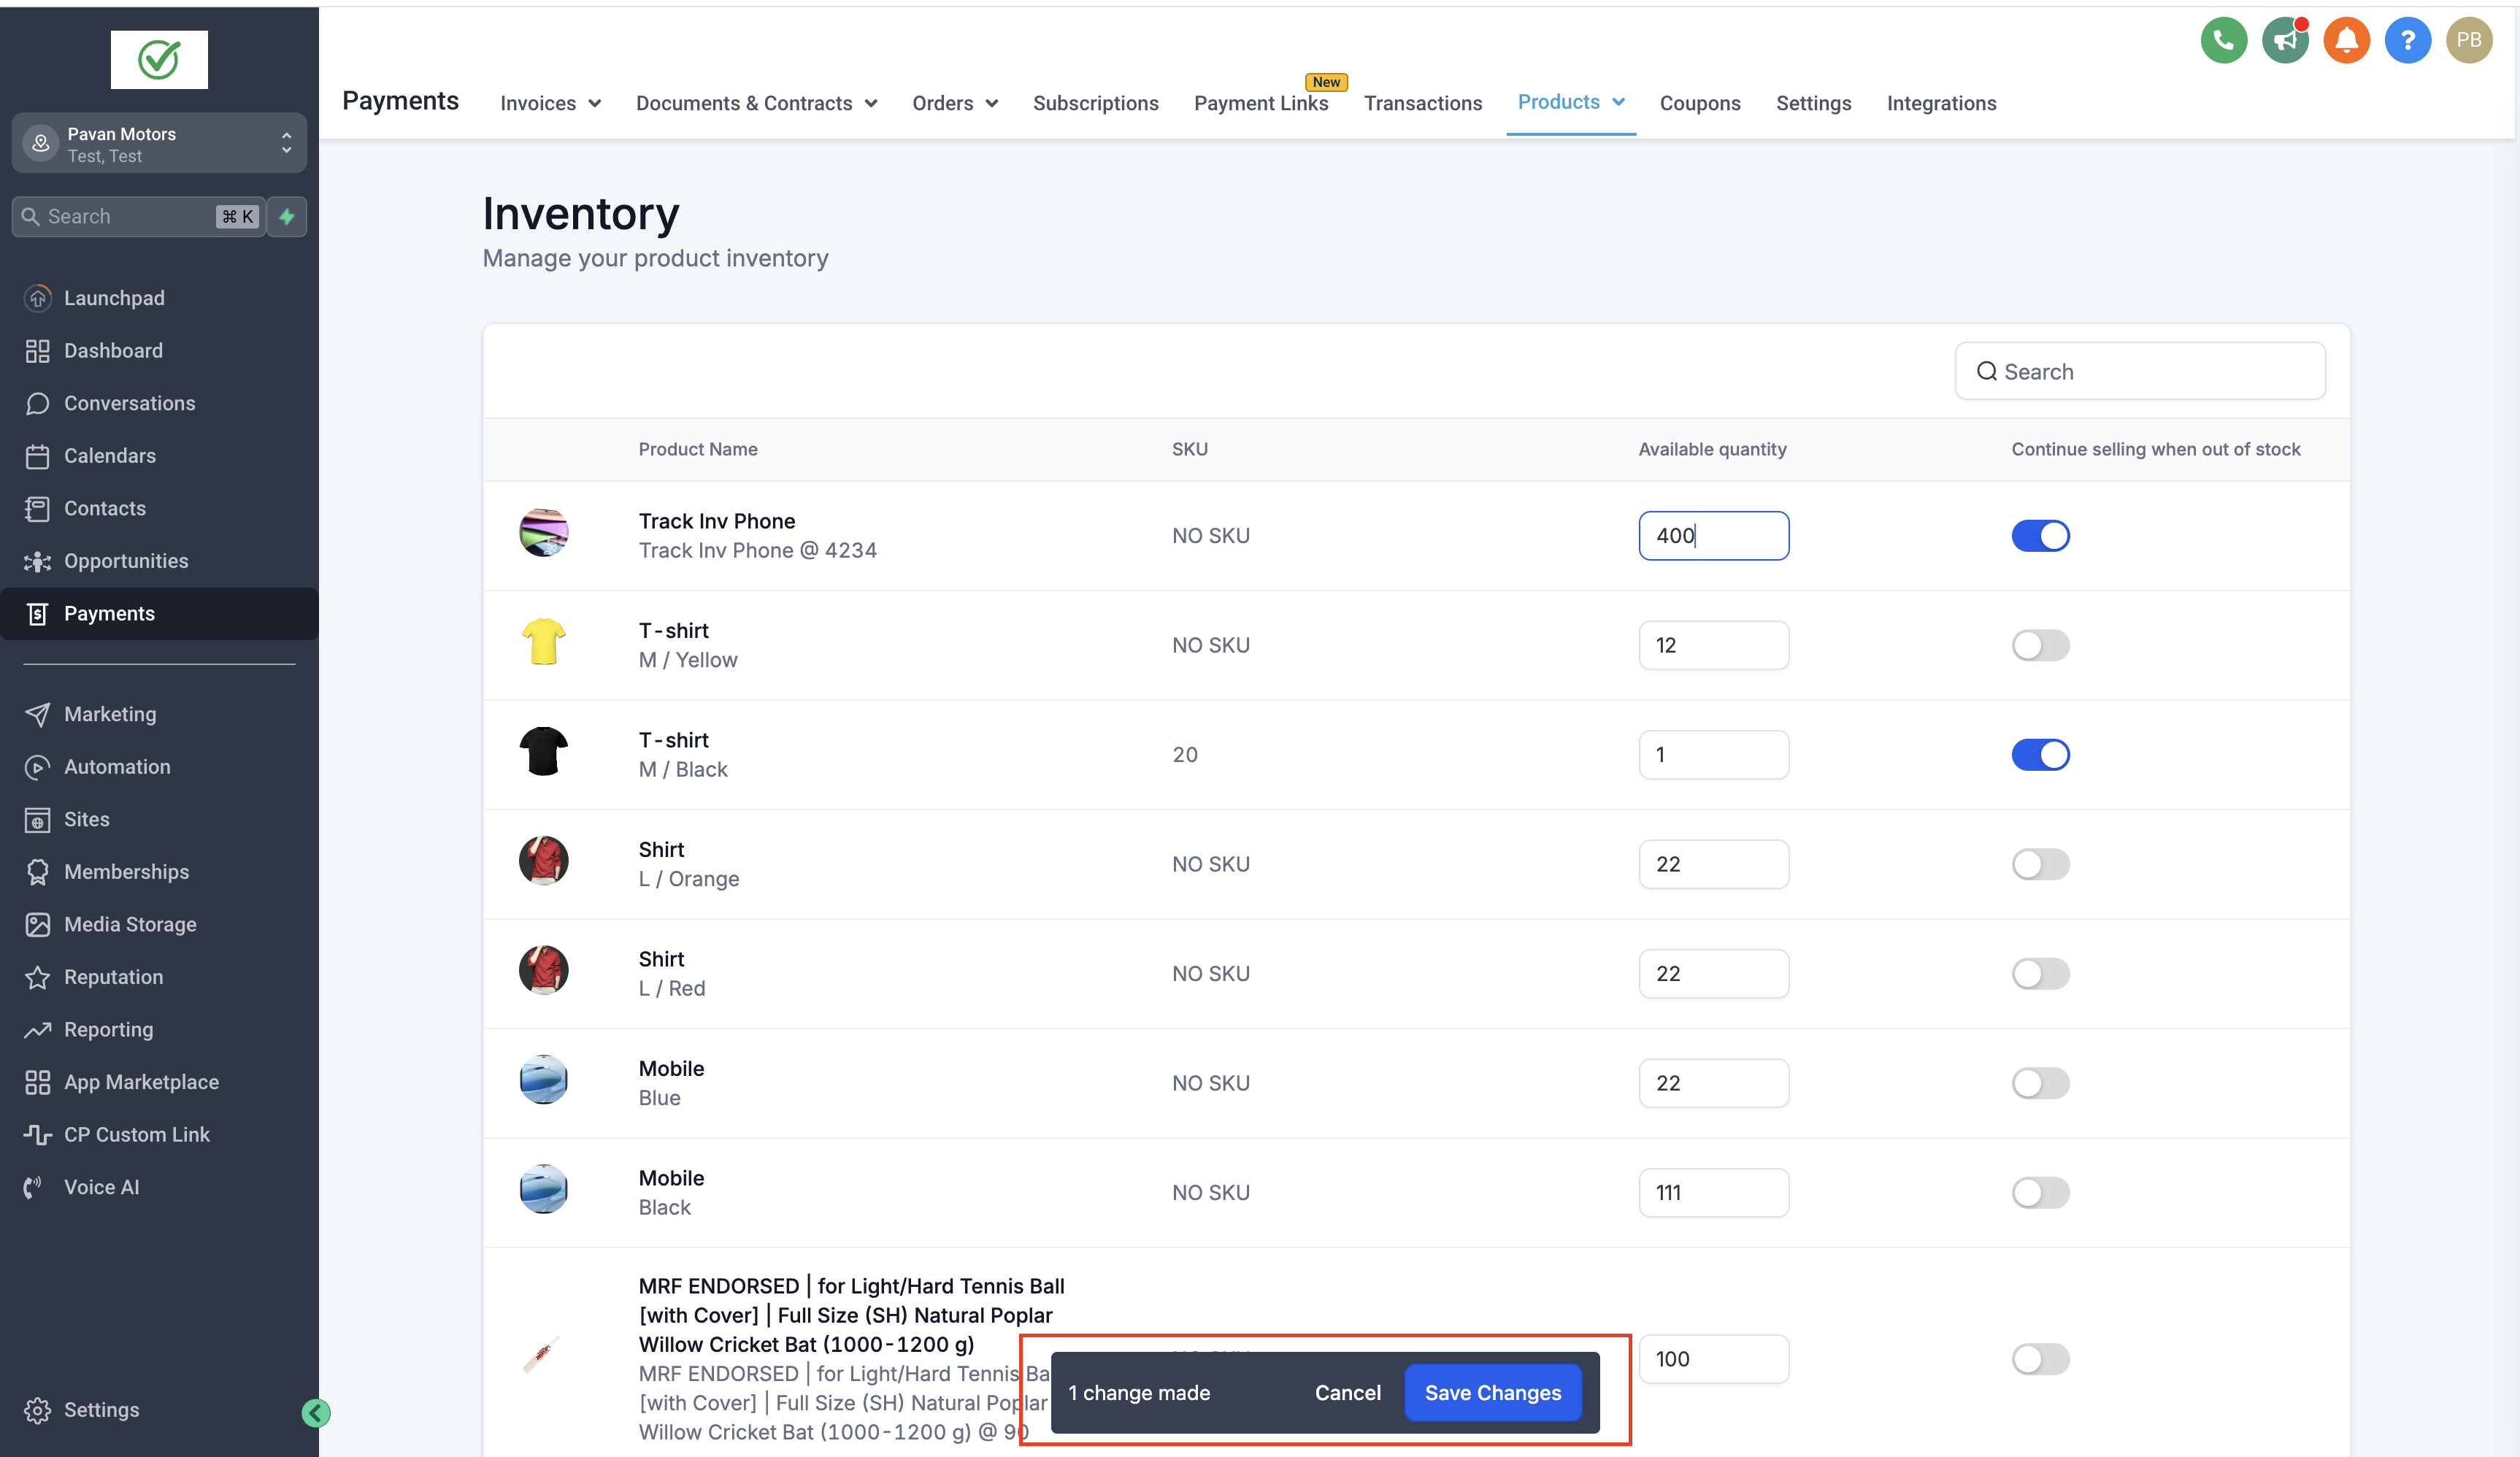
- On Inventory management page, store owners can update product quantities for any variant. If you want to allow "Continue selling when out of stock" toggle this option on.
- After making inventory changes, ensure to click Save to apply them, or Cancel to discard them.
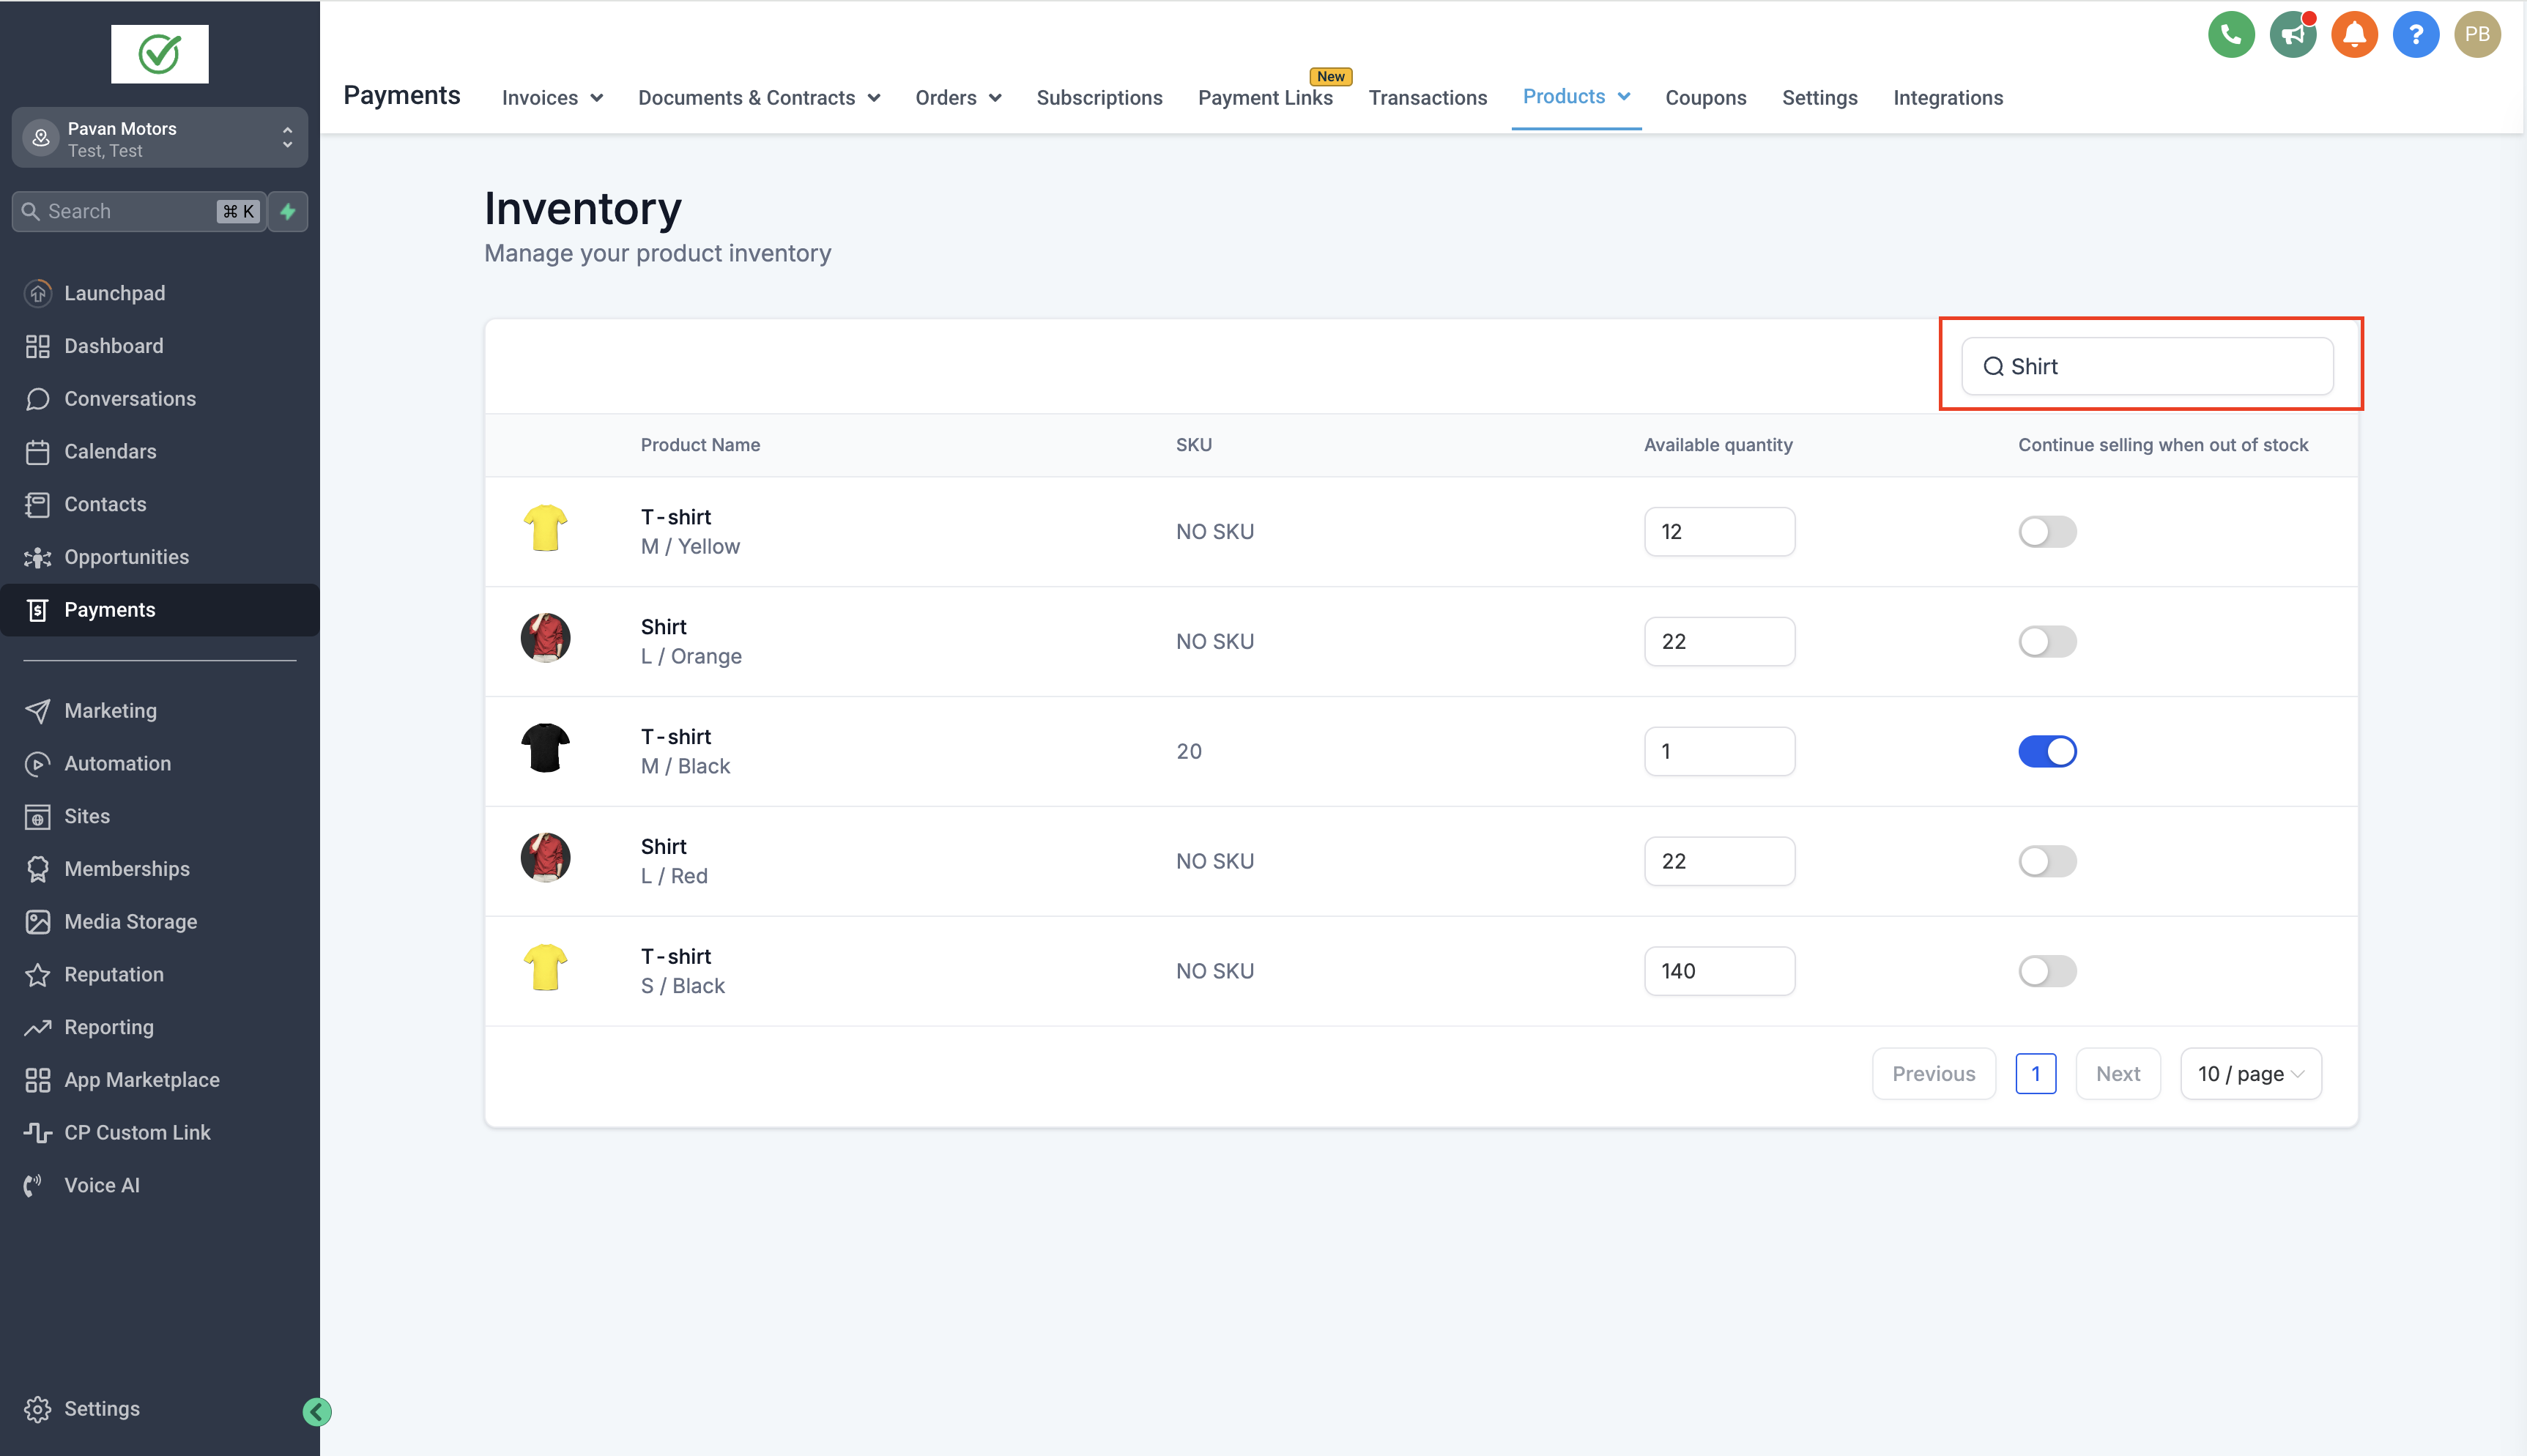
- To find specific products, you can search by SKU or product/variant name.
Notes:
- Changes must be saved or canceled before navigating away from the page; unsaved changes will block page navigation.
- If a SKU is not provided, it will display as "NO SKU."
- Clicking on a product variant will redirect to the variant detail page from the Inventory page.
I
mages
:Inventory page:
Apply or discard changes:
Search for products based on SKU or product variant name:
new
Affiliate Manager
Sub Account Affiliate Manager: Pay-Per-Lead model for Affiliate Campaigns
We’re excited to announce the launch of the Pay-Per-Lead (PPL) model for affiliate campaigns, a new feature that enables a performance-based commission model where affiliates earn a commission for every lead they refer, not just on completed sales.
👀
What’s New?
- Pay-Per-Lead (PPL) Model: Affiliates can now earn commissions based on the leads they generate through actions like form submissions, calendar bookings, or survey completions.
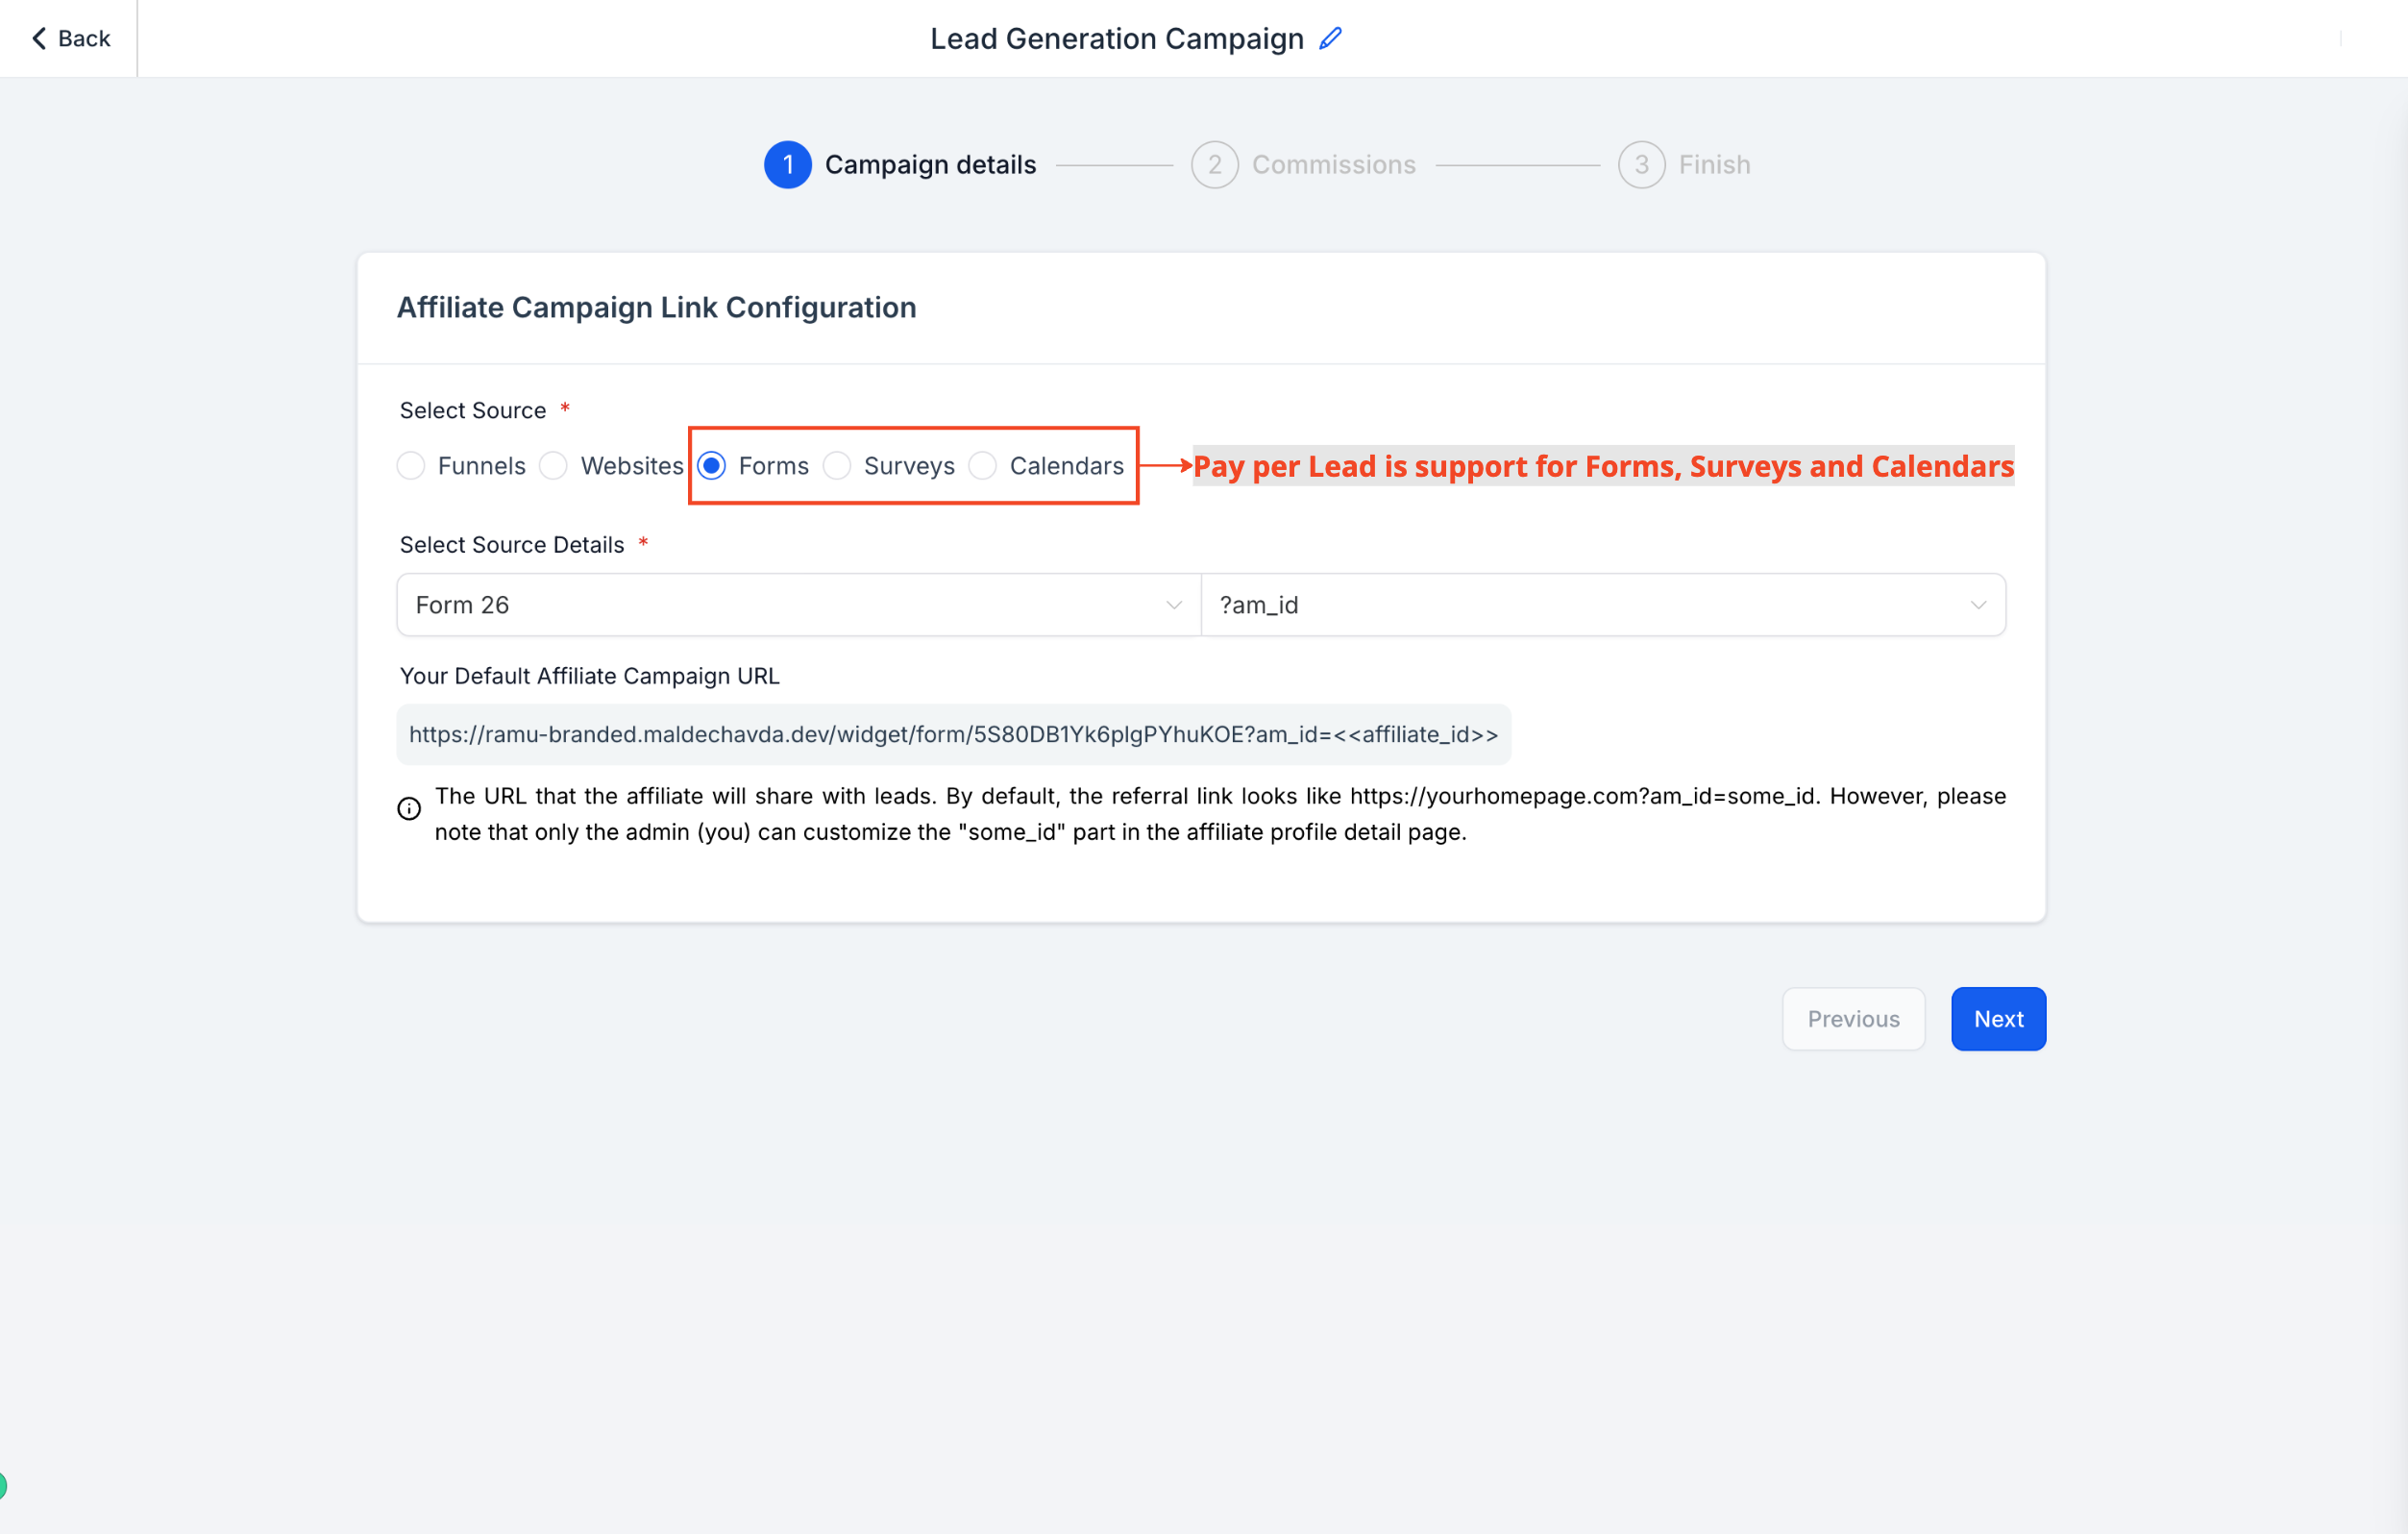
- Source Type Support: The PPL model is now supported for Forms, Surveys, and Calendars.
- Flexible Commission Settings: Configure lead commissions with options for per-lead payments and advanced tiered commission structures
👷
How It Works:
- Create a New Campaign: Set up a campaign and select Forms, Surveys, or Calendars as the source.
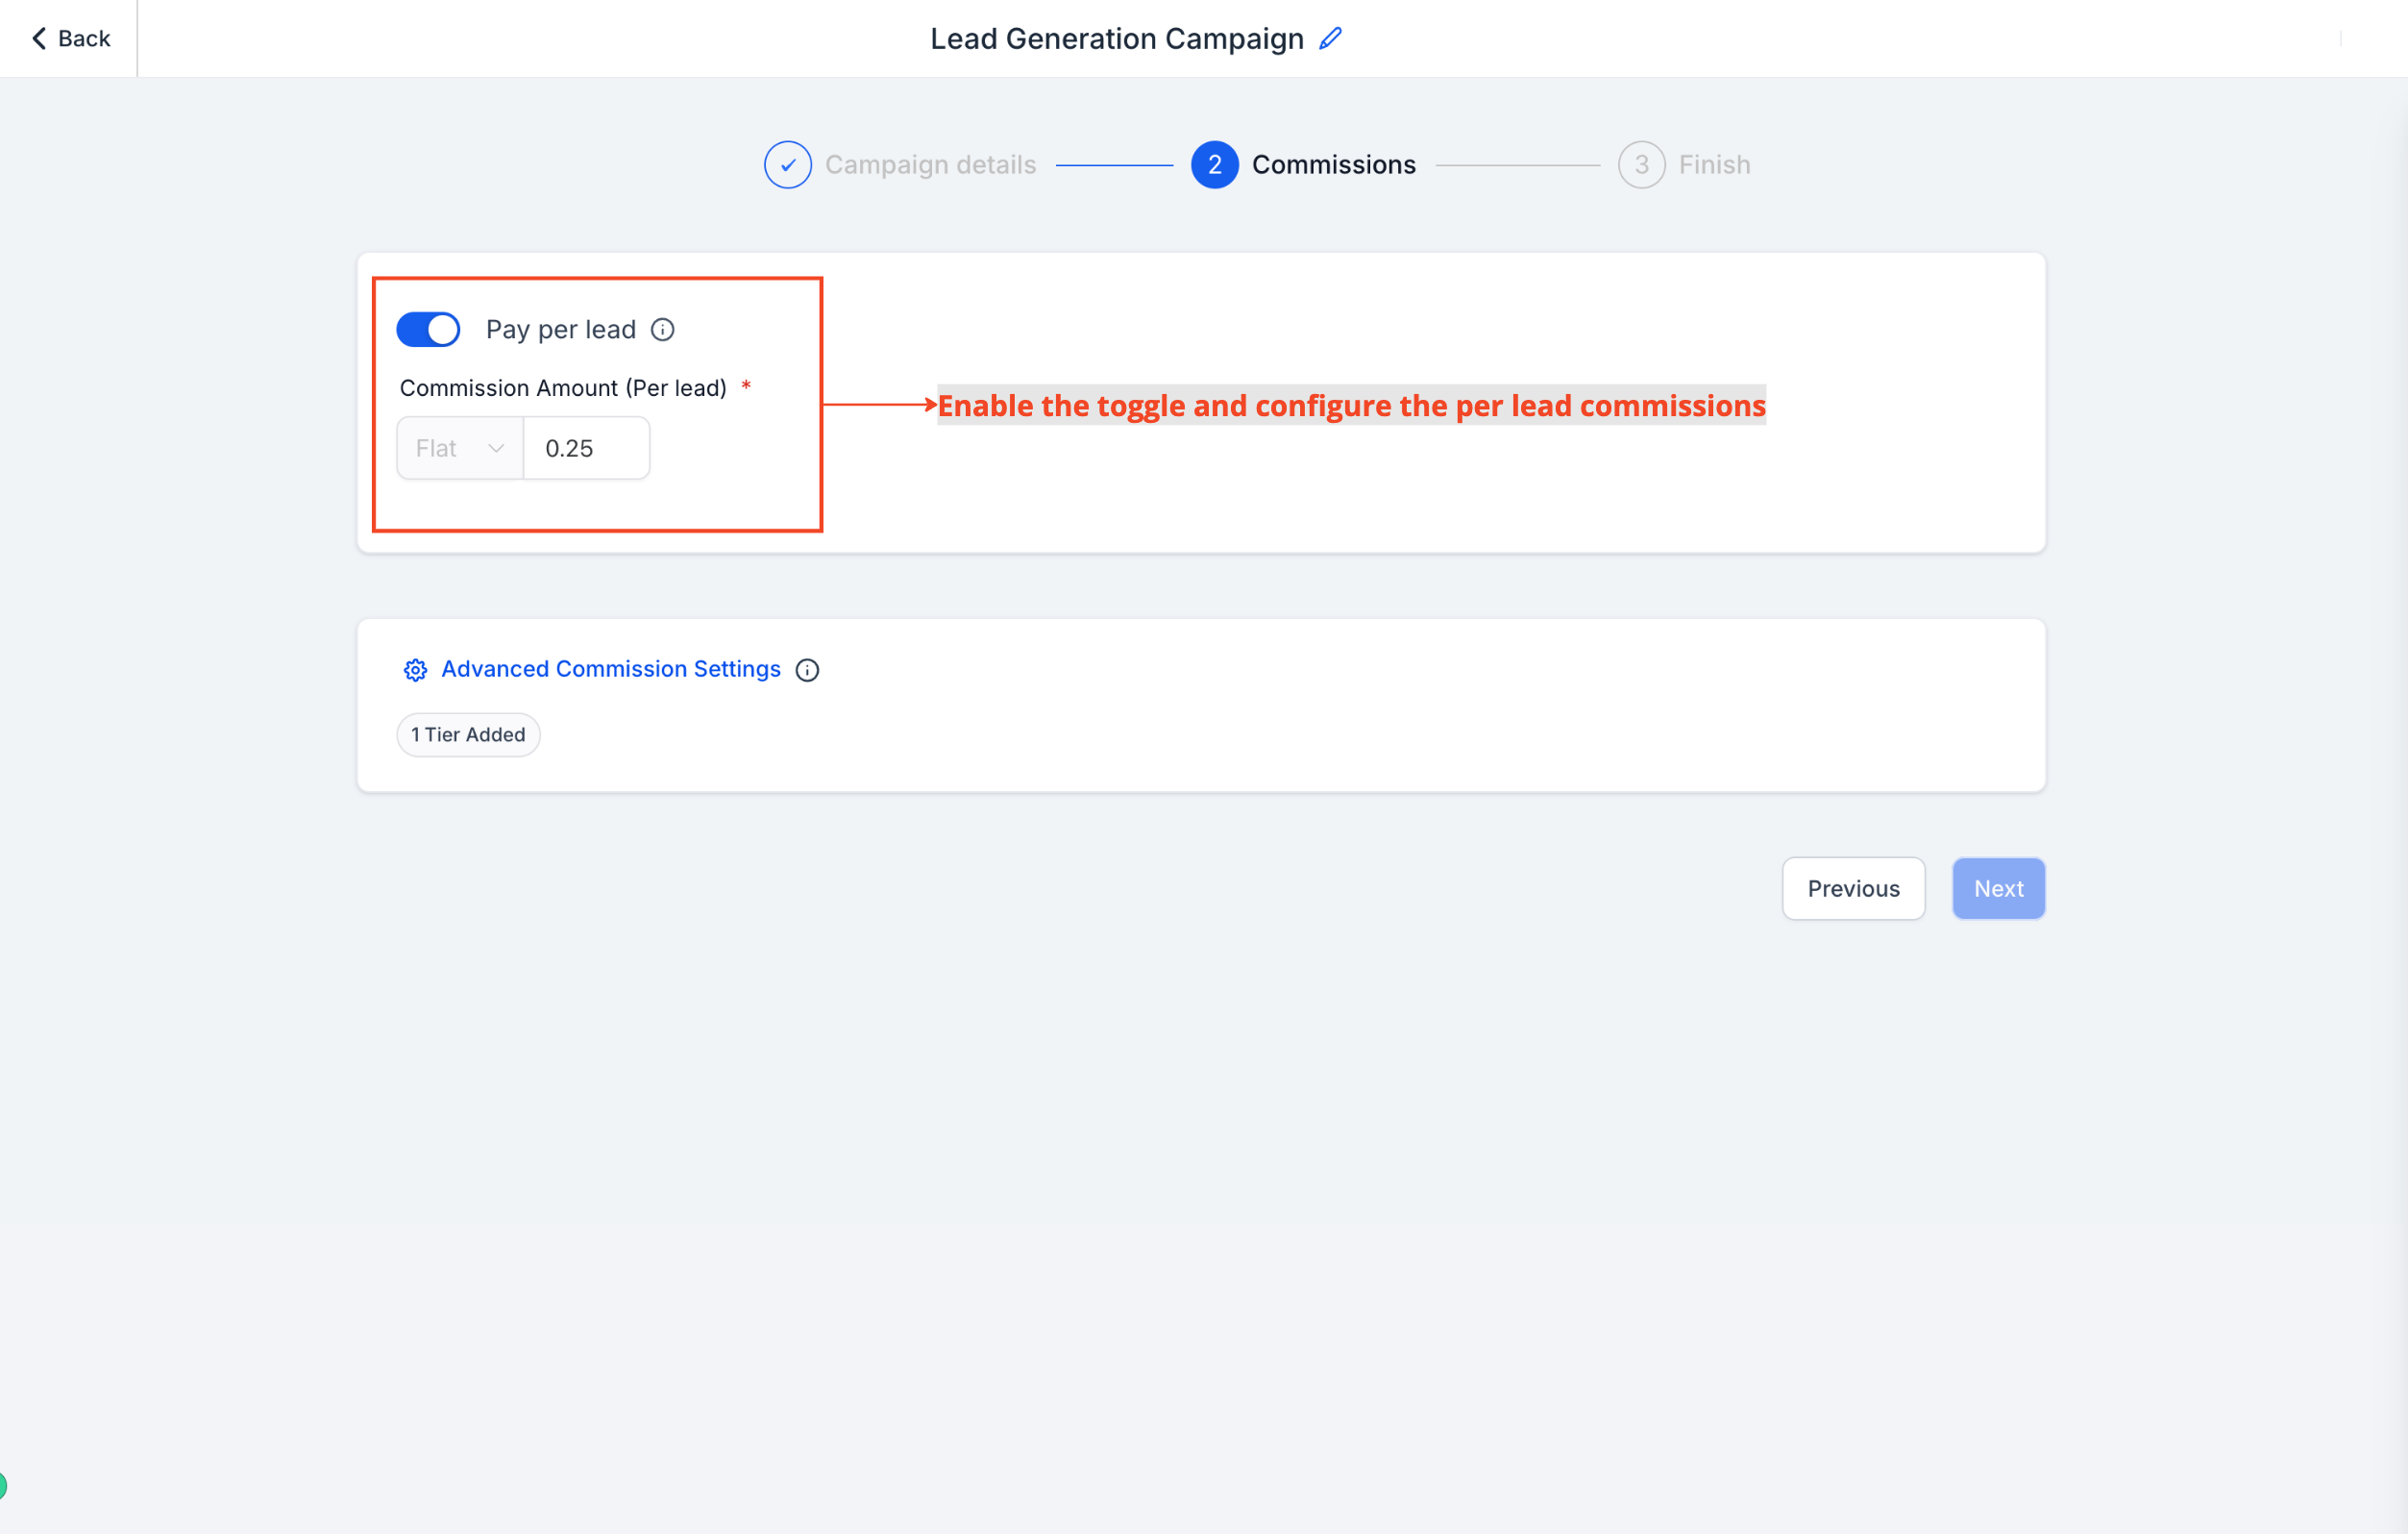
- Enable Pay Per Lead: Go to the Commissions tab and enable the Pay Per Lead option.
- Set Per Lead Commission: Determine the commission amount affiliates will earn for each lead.
- Advanced Commission Settings (Optional): Configure additional tiers if needed.
- Add Campaign Details & Assign Affiliates: Provide a description, assign affiliates, and finalize your campaign settings.
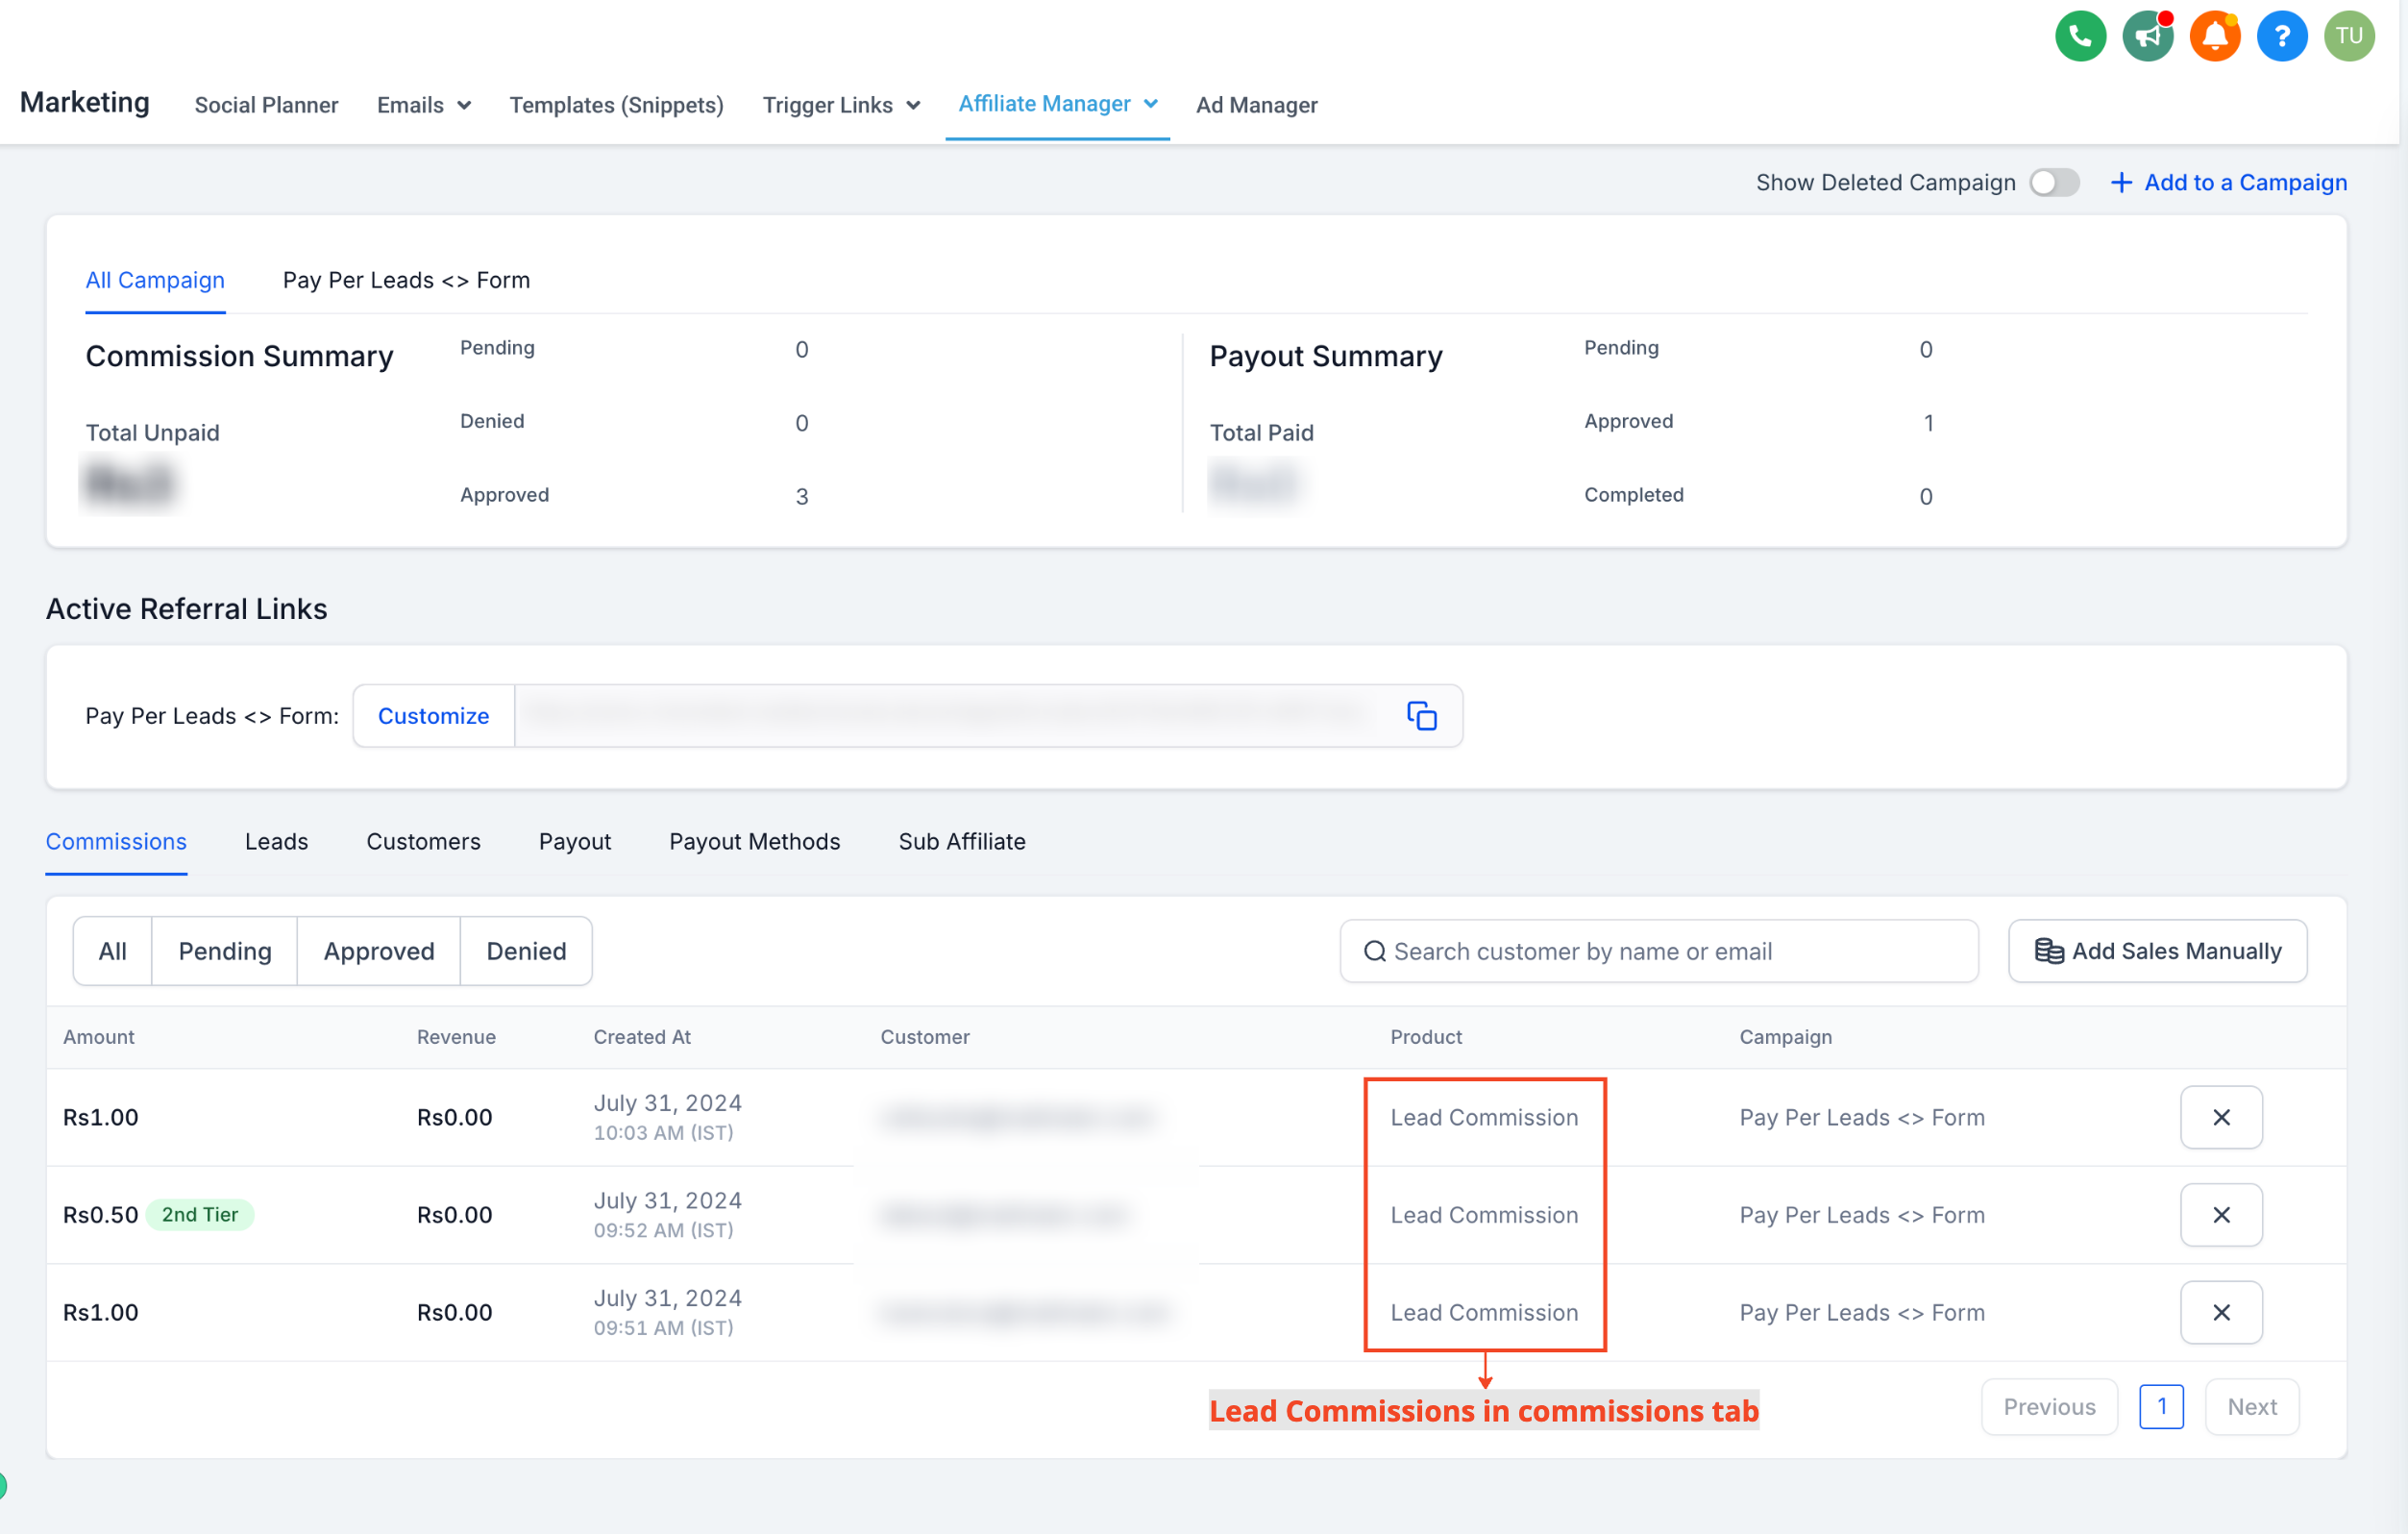
- Track Leads and Commissions: Once live, new commissions are automatically generated and can be tracked in the Commissions tab within the affiliate’s profile page. The product column will indicate "Lead Commission."
⭐
Why it Matters
:- Cost Efficiency: PPL programs generally have lower per-lead commissions, helping manage overall costs.
- Increased Lead Generation: Affiliates may generate more leads than sales, offering more opportunities for engagement.
- Improved Flexibility: Tailor your commission structures with multiple tiers and support a variety of actions to suit your business needs.
📌
Important Notes
:Pay per lead is supported in campaigns with source as forms, surveys or calendars
Click here for the detailed help document and walkthrough video

new
Funnels and Websites
Zip file upload support and other enhancements
What's new ?
Users can now upload compressed .zip files in media storage and through public API.
Size limit - 100 MB
How to Use
For uploading the zip files, Navigate to the media storage -> Click New upload button -> select Upload file -> choose any of the zip file from your desktop
Enhancements
Updated the thumbnail image quality for unsplash images.
🚅 Performance Optimization: Processing speed of loading thumbnails is increased.
new
improved
fixed
Social Planner
Upgraded UI of Social Planner 🚀 😍
Social Planner UI has been upgraded to bring more consistency and better user experience. 😊
🚀 We are excited to announce that Social Planner has implemented some mind-blowing changes in UI/UX, such as:
- Bringing list view and calendar view side by side
- Name a filter and it will be there to help you filter the content
- Addition of preview panel to save you time and view the post content
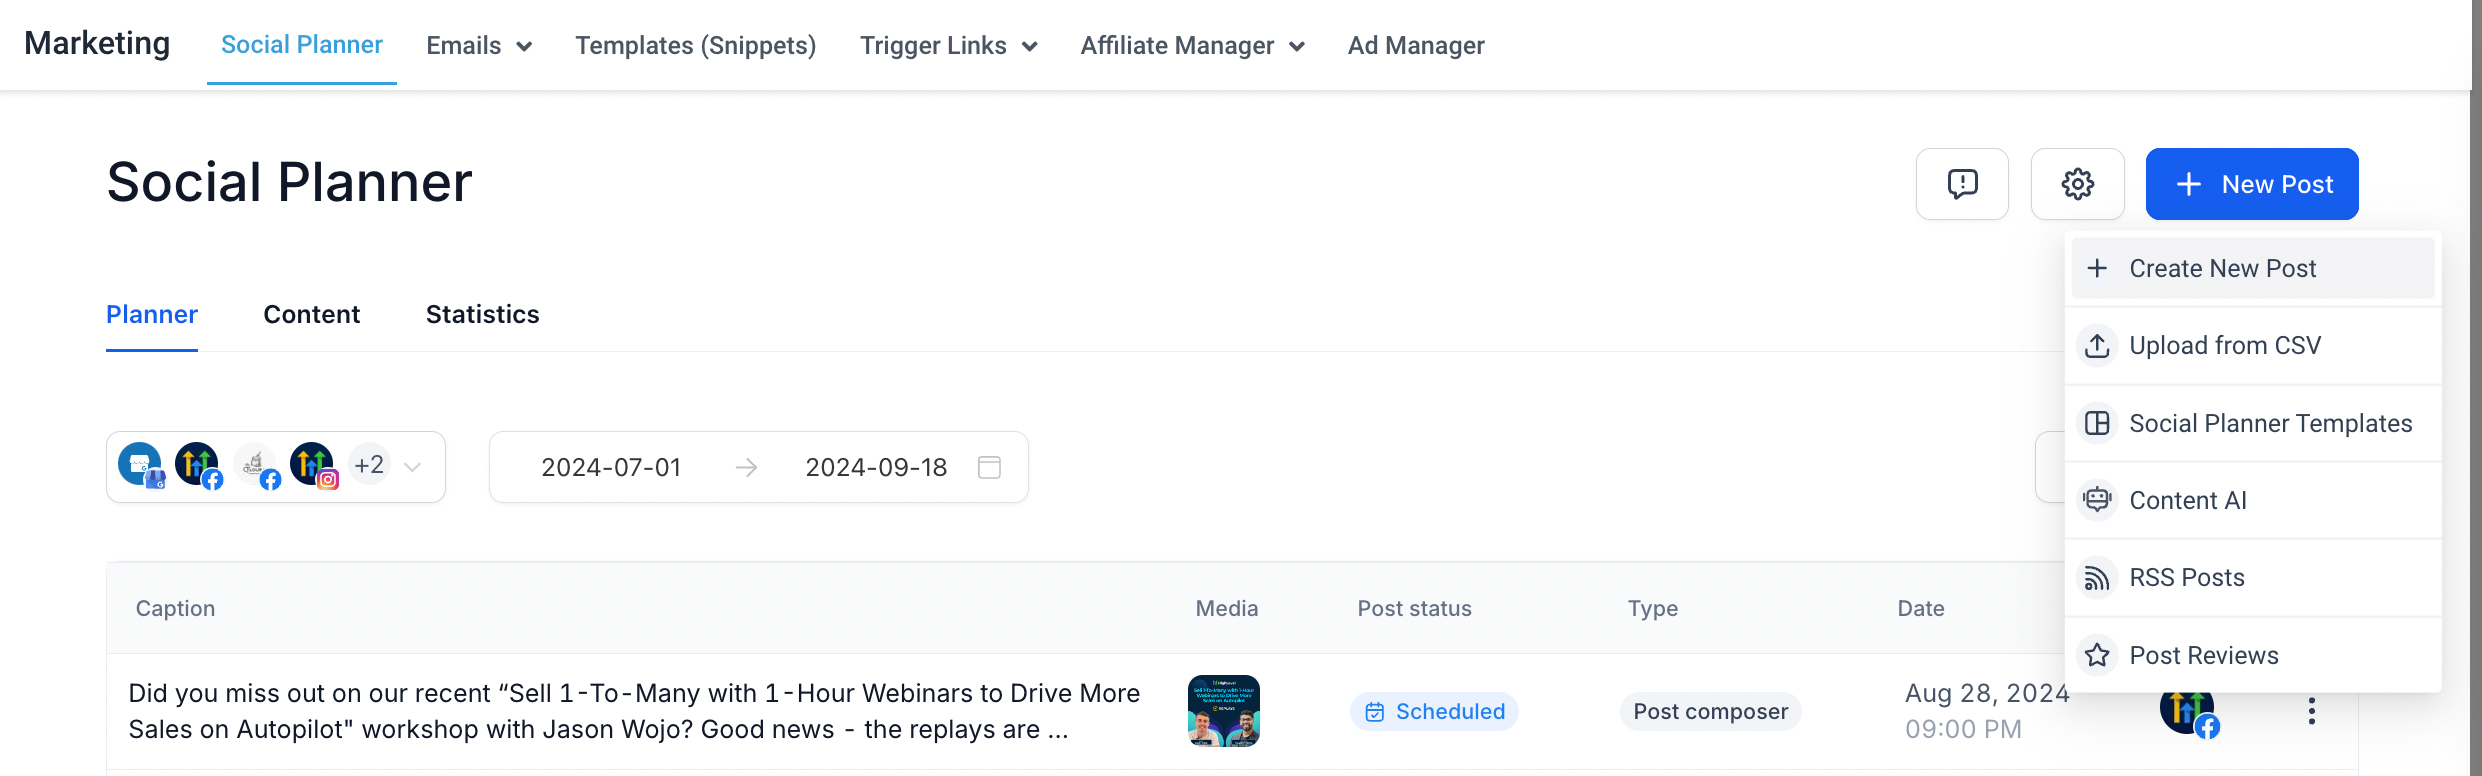
- Three different tabs: Planner (to view all posts), Content (to view specific functions like CSV, approval, recurring, RSS, and review post automation management), and Statistics (to manage social post analytics)
😎😎
What’s New?
- In Planner view, you can check content within a specific time range. It allows you to filter by content type, status, approval status, created by, approver, category, and tag.
- Planner view offers both list and calendar views for a better perspective.
- In Planner view, users can preview posts without going to the post composer view. They can also see stats for recently published posts.
- In Content view, users can manage the following:
- View CSV content and fix errors by clicking "Review and Schedule."
- Adjust recurring settings, such as modifying the parent post.
- Update review settings, including review automation, background, post schedule, and review stars, along with play/pause options.
- Modify RSS settings, including play/pause and edit options.
- Manage the template library settings for selected Social Planner templates.
- View posts requiring approval, whether they were created by the user or if the user is the approver, as well as approved and rejected posts, along with the reasons.
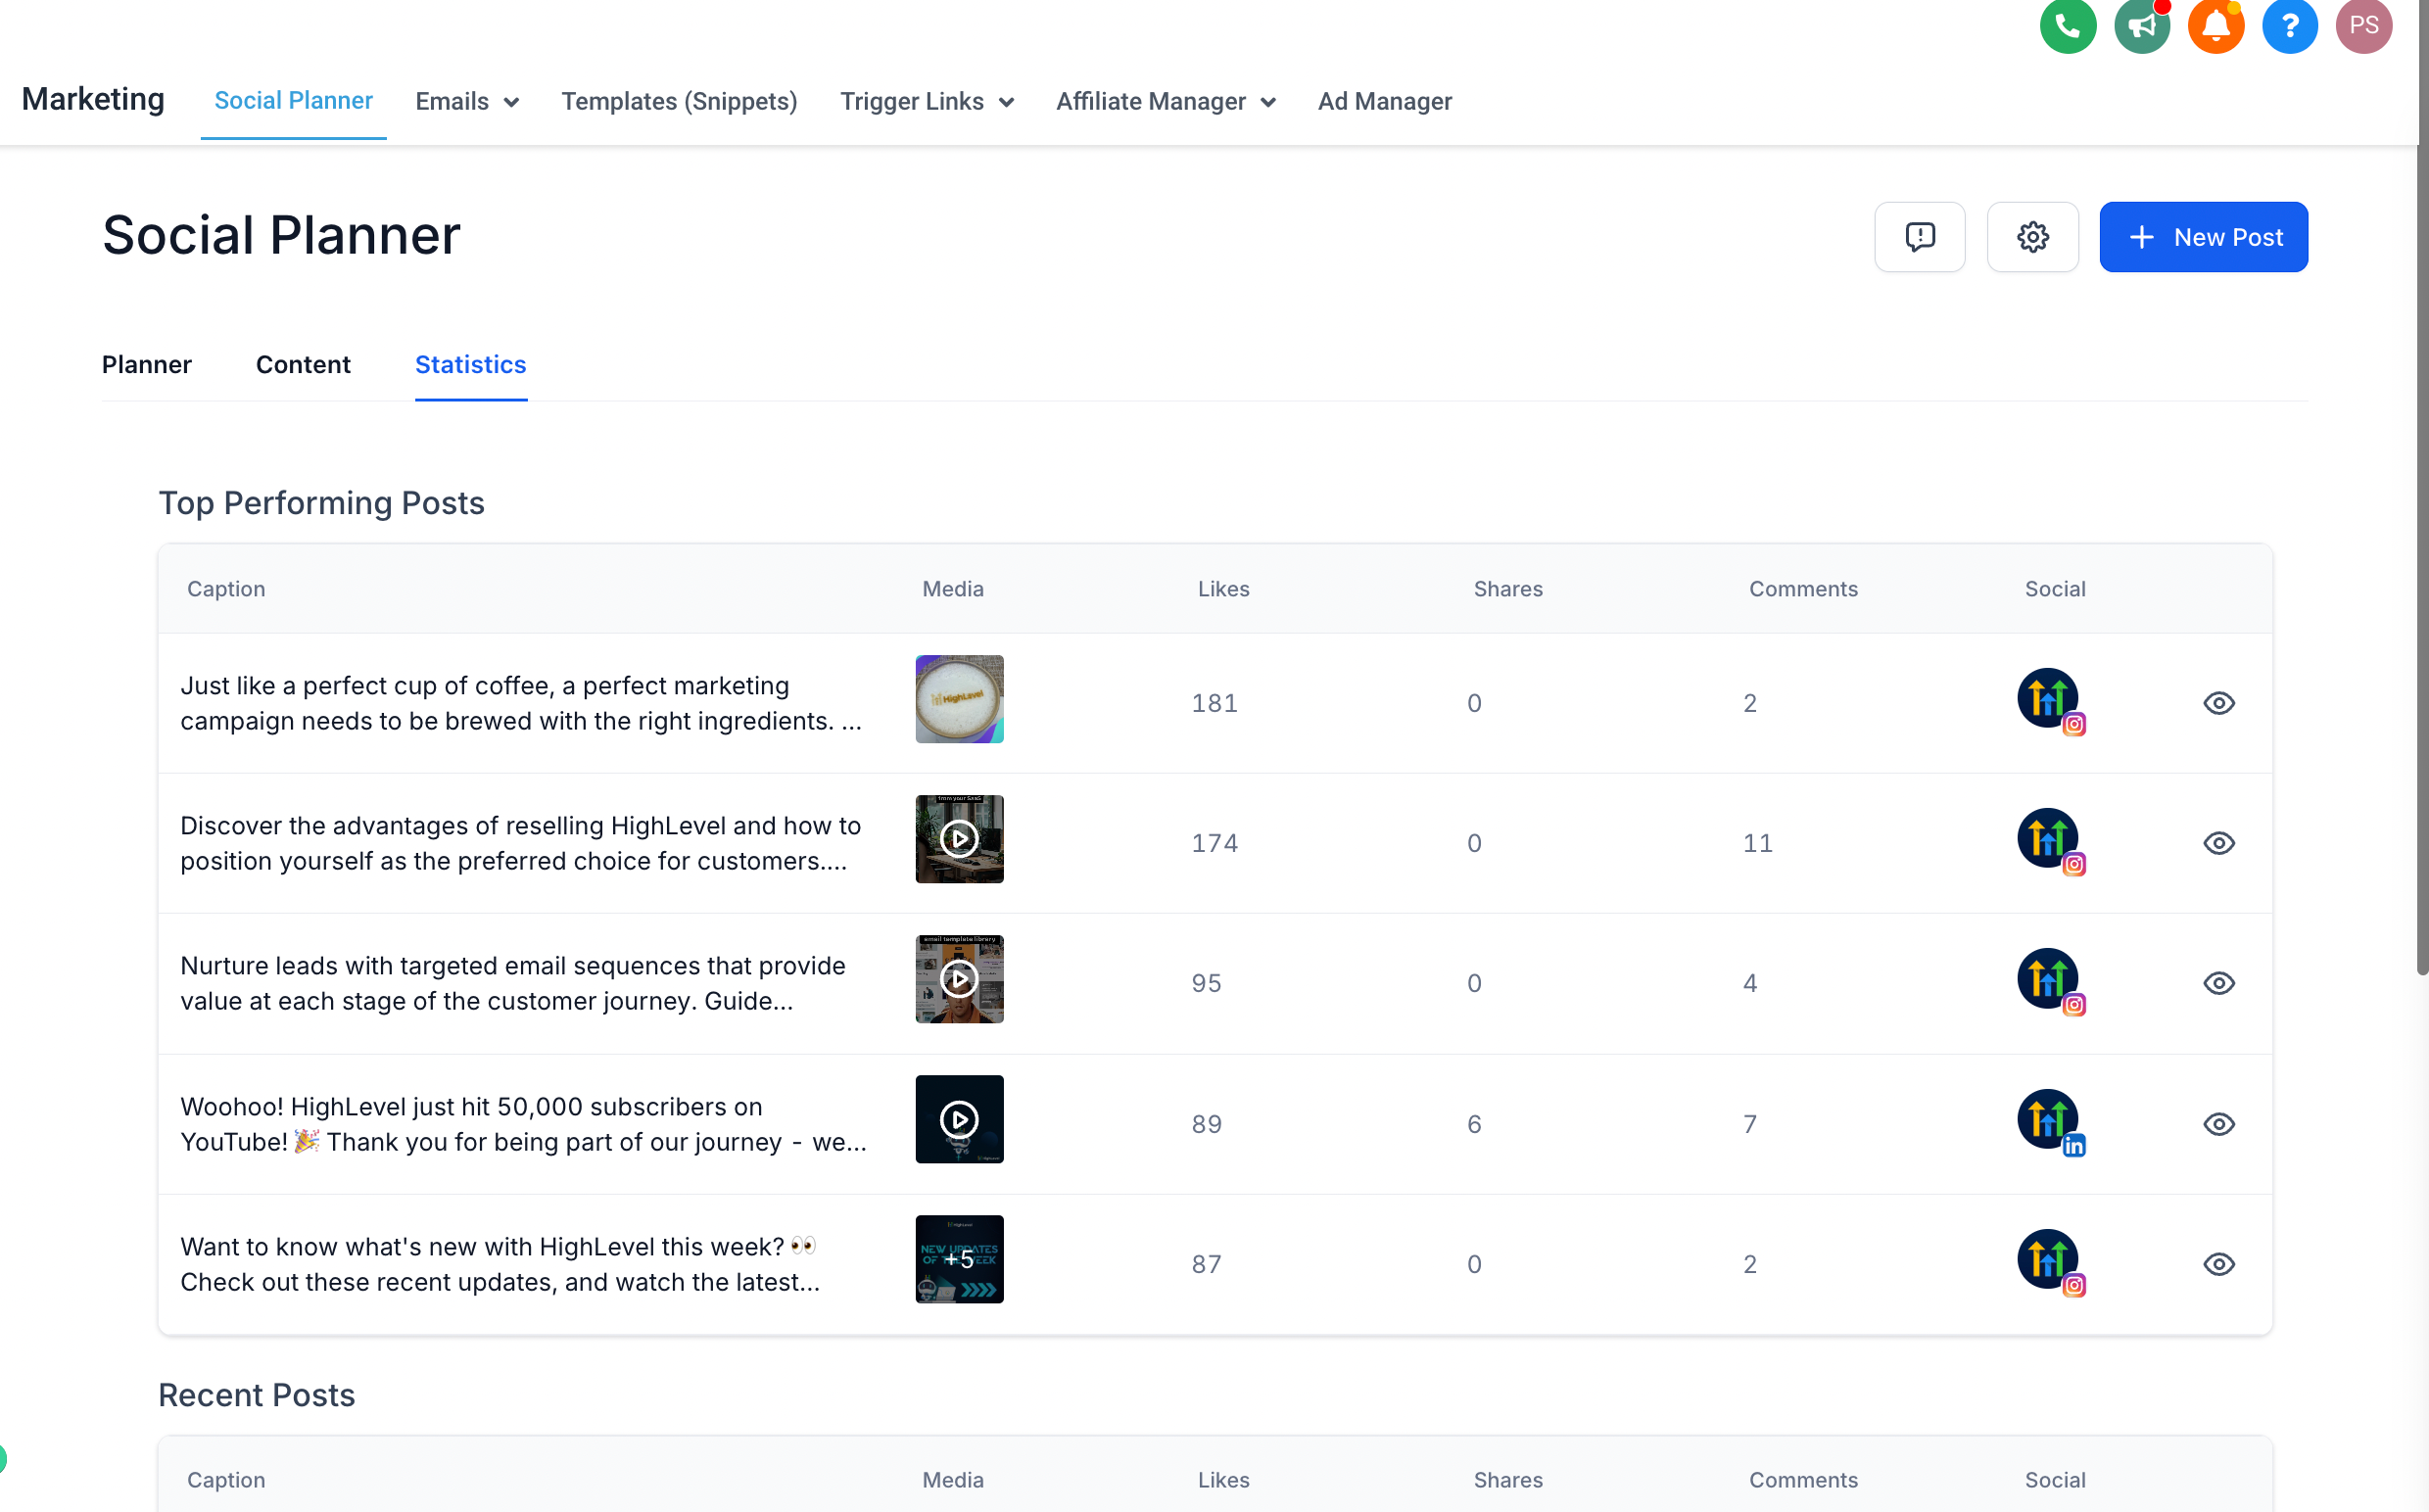
- In Statistics, users can view data of top-performing posts and recent posts.
😇
FEATURES - NEXT IN LINE !!!
Post Composer upgrades in UI, providing better preview, more caption writing area, and improved error handling
Post Composer will allow users to handle multiple video format posts like TikTok, YouTube, and Facebook Reels together
We are thrilled to announce our new web templates, designed to elevate your marketing efforts. Whether building a website, creating a sales funnel, or sending email campaigns, our versatile and user-friendly templates have you covered. Fully customizable and professional, they streamline your workflow, saving you time and letting you focus on engaging your audience and driving results.
List of New Templates
------------------------------------------------------
🚀 2 New Website Templates Published 🚀
------------------------------------------------------
Beauty & Fashion - 1
Travel & Hospitality - 1
------------------------------------------------------
🚀 2 New Funnel Templates Published 🚀
------------------------------------------------------
Financial - 1
Insurance - 1
------------------------------------------------------
🚀 1 New Email Templates Published 🚀
------------------------------------------------------
Travel & Hospitality - 1
-----------------------------------------------------
🚀 1 New Form Templates Published 🚀
-----------------------------------------------------
Restaurant & Bar - 1
-----------------------------------------------------
🚀 1 New Survey Templates Published 🚀
-----------------------------------------------------
Legal - 1
-----------------------------------------------------
🚀 2 New Social Templates Published 🚀
-----------------------------------------------------
Legal - 2
------------------------------------------------------
📣 2 New Snapshot 📣
------------------------------------------------------
Real Estate - Property Management
Country Retreat
Defense Lawyer
Donut Shop
Investment
Life Protection
Nail Spa
Personal Injury Attorney
Tour Guide
New Snapshot - Real Estate - Property Management


improved
Automatioon
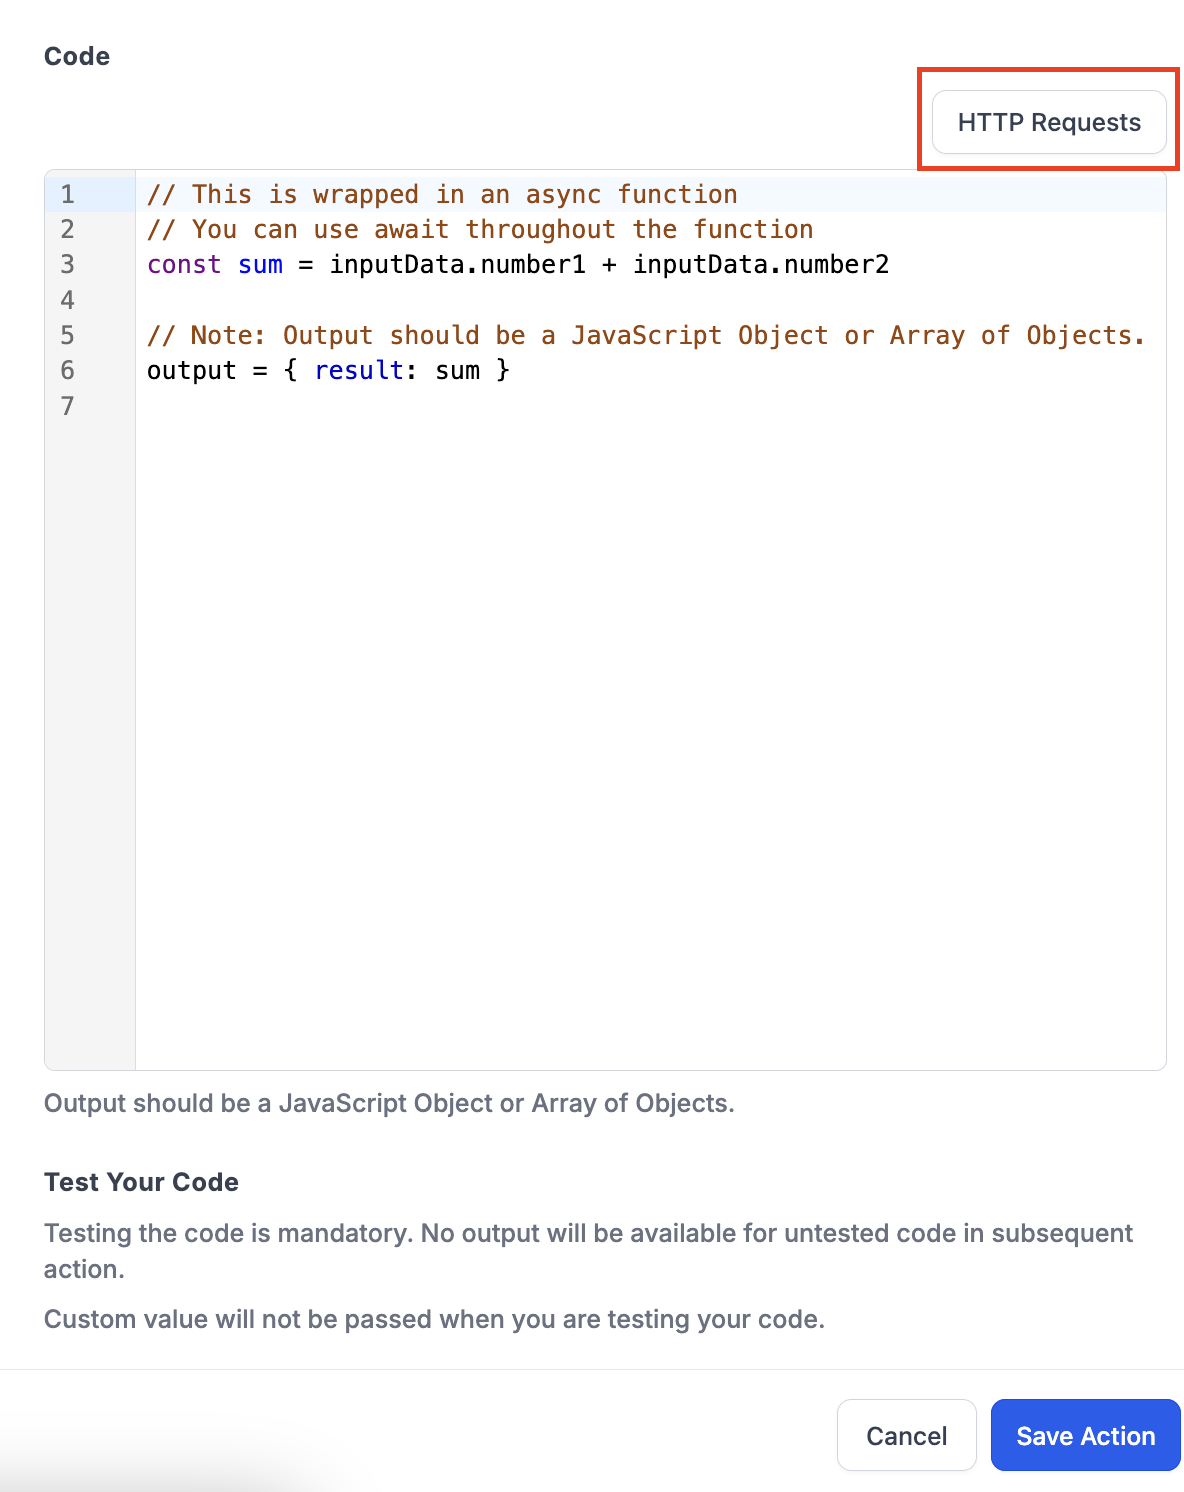
Custom Code now supports External HTTP requests
We’ve introduced a new custom code action in workflows that supports HTTP requests within the isolated VM environment. This feature allows users to write, execute, and test their code with integrated HTTP requests directly in the workflow.
How to use?
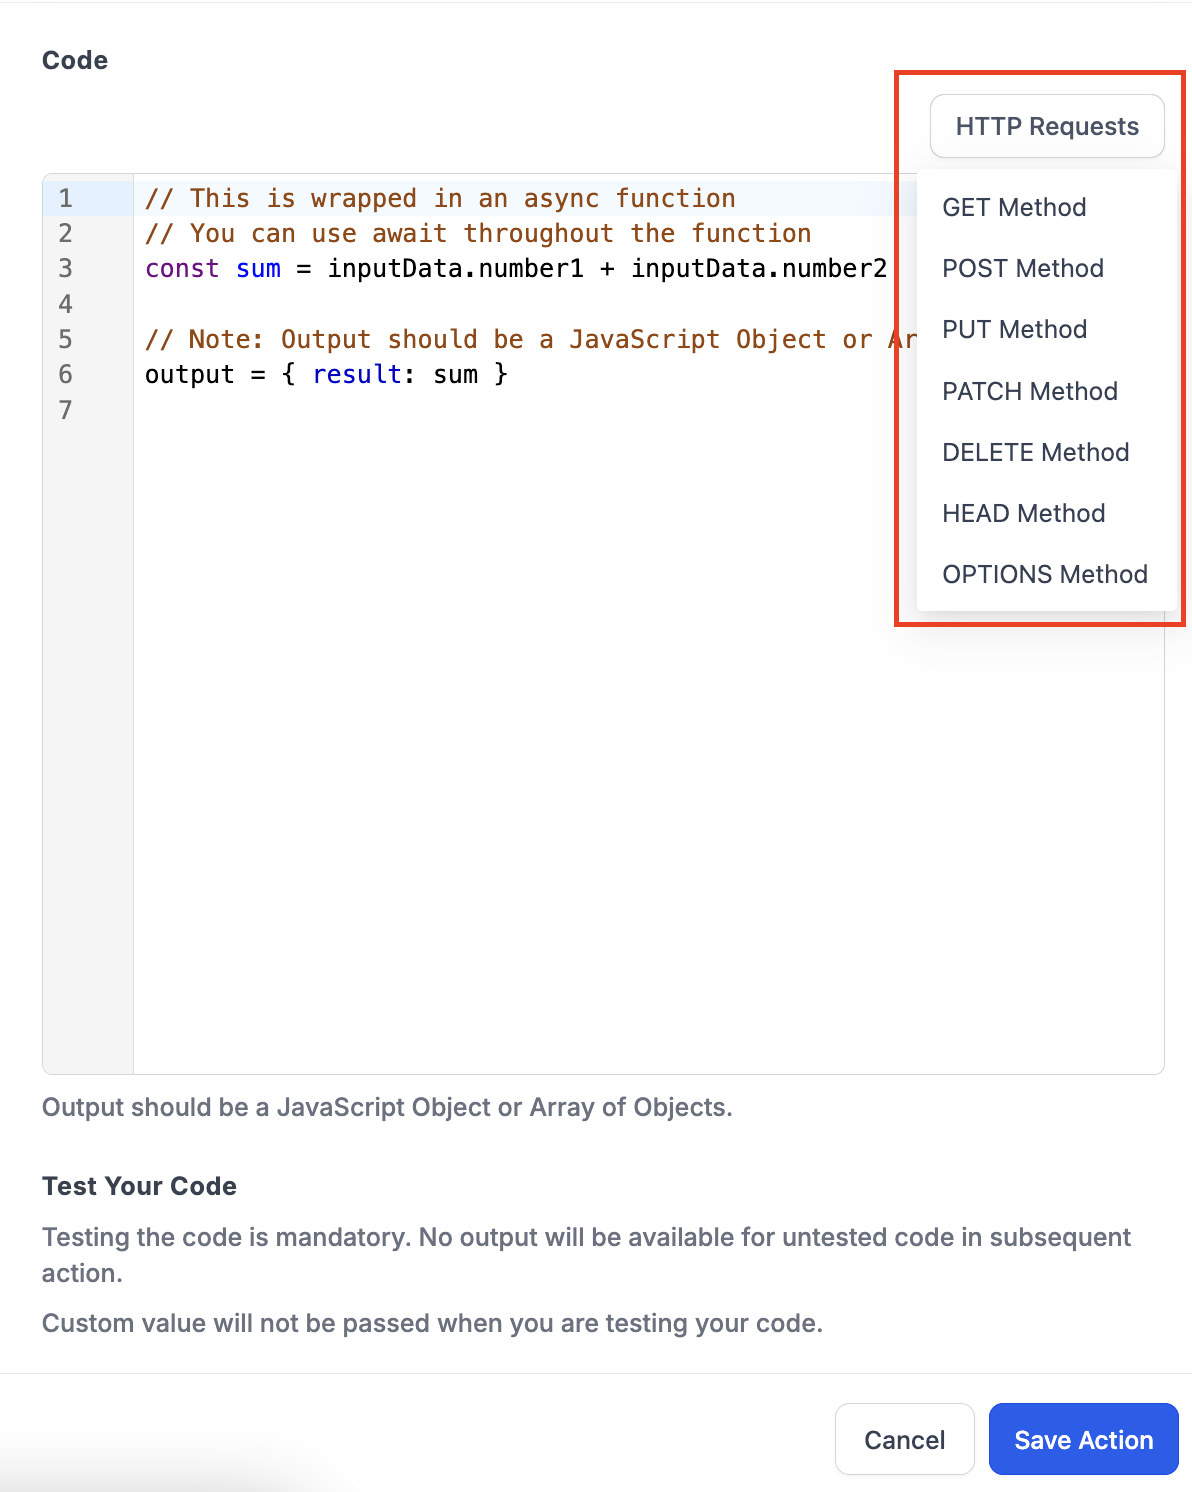
- Click on "HTTP Request" button above the code editor
- Select from the following -
- Get Method
- Post Method
- Put Method
- Patch Method
- Delete Method
- Head Method
- Options Method
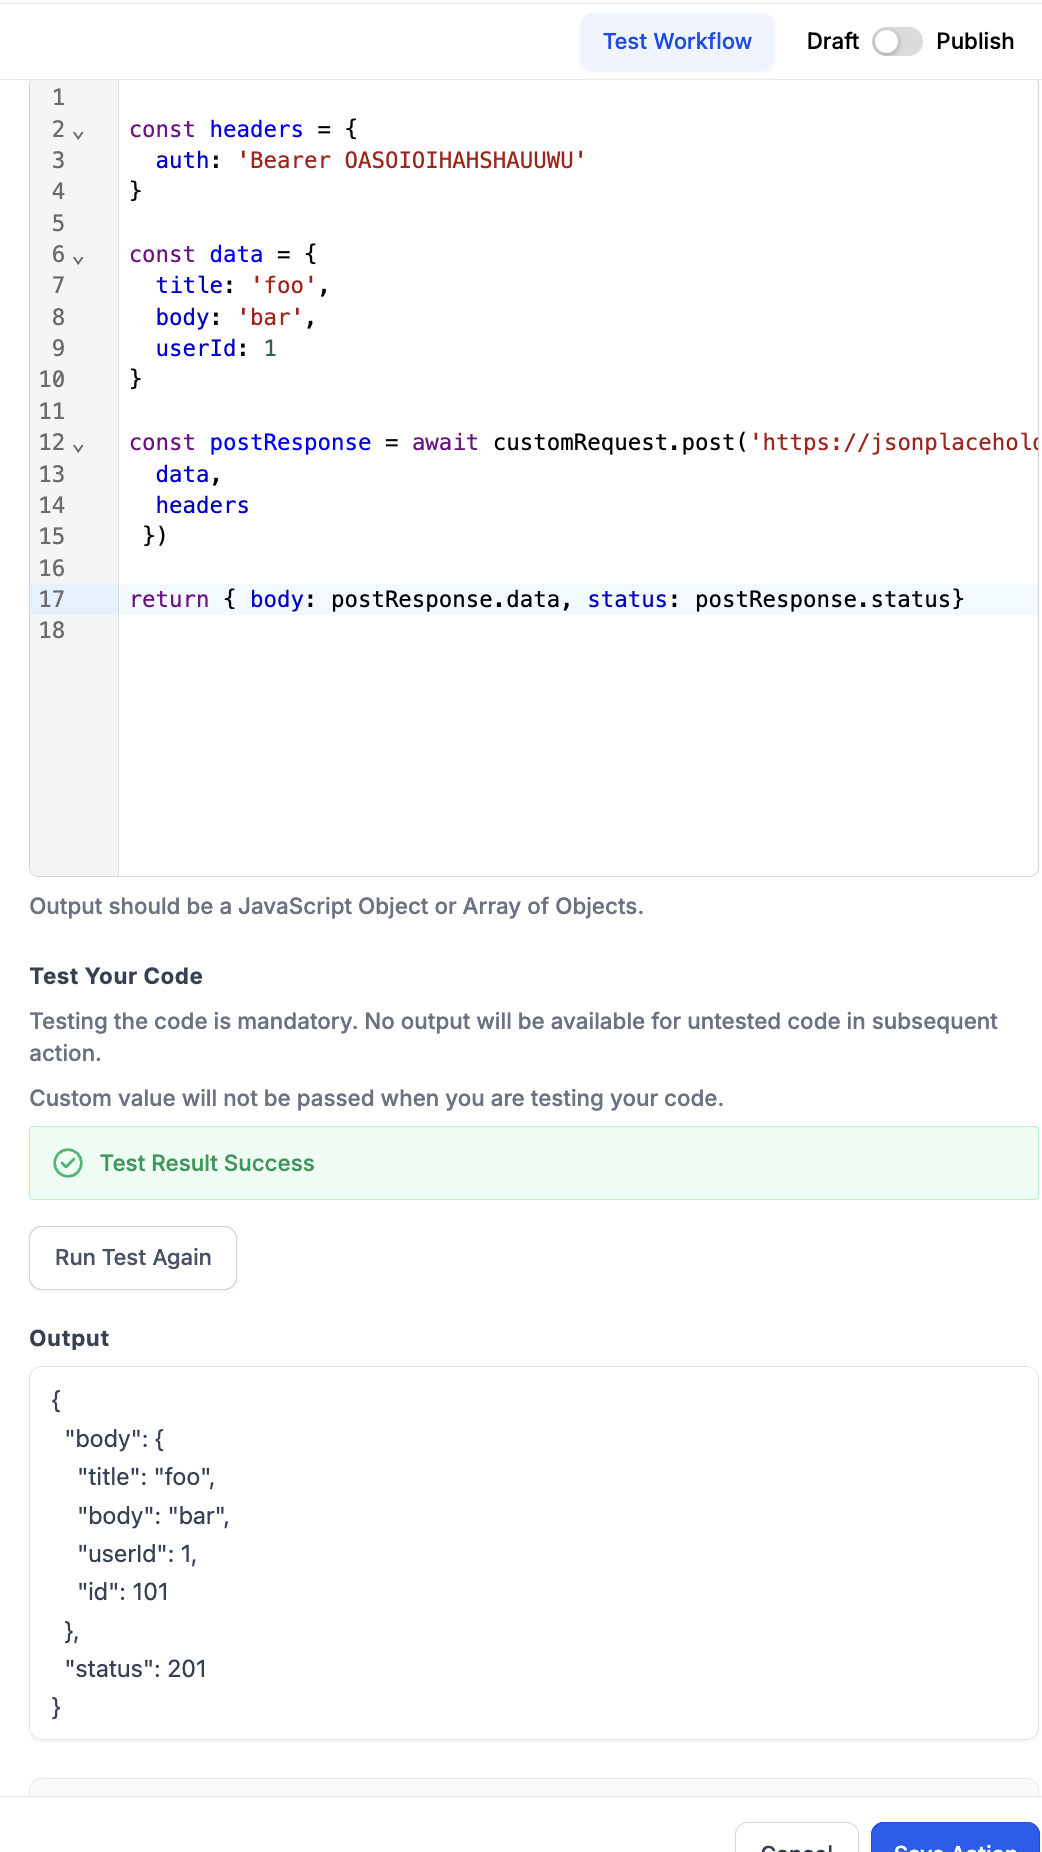
- The selected request will populate at the bottom in the code editor
new
Funnels and Websites
[LABS] New coloring options in Funnel and Website builder
[LIVE IN LABS CURRENTLY]
Brand-new color palette in our Funnel and Website Builder! This update streamlines the color customization process, allowing you to easily enhance your designs with a more unified and flexible approach.
What’s New?
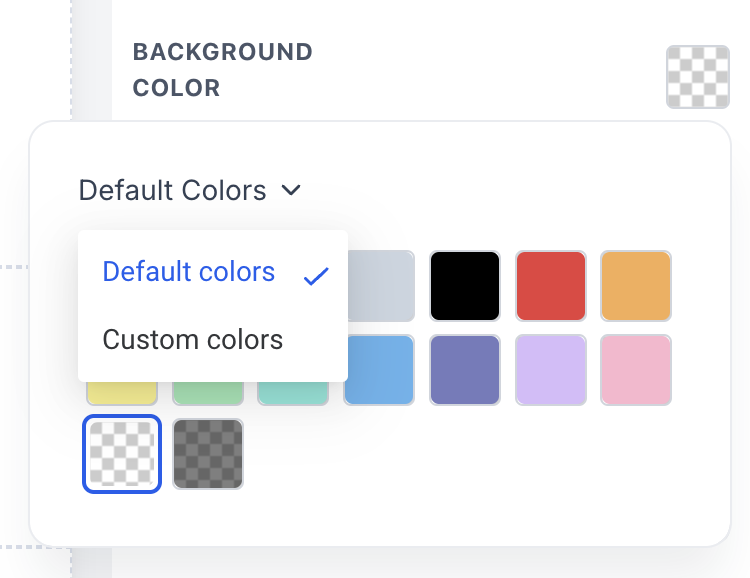
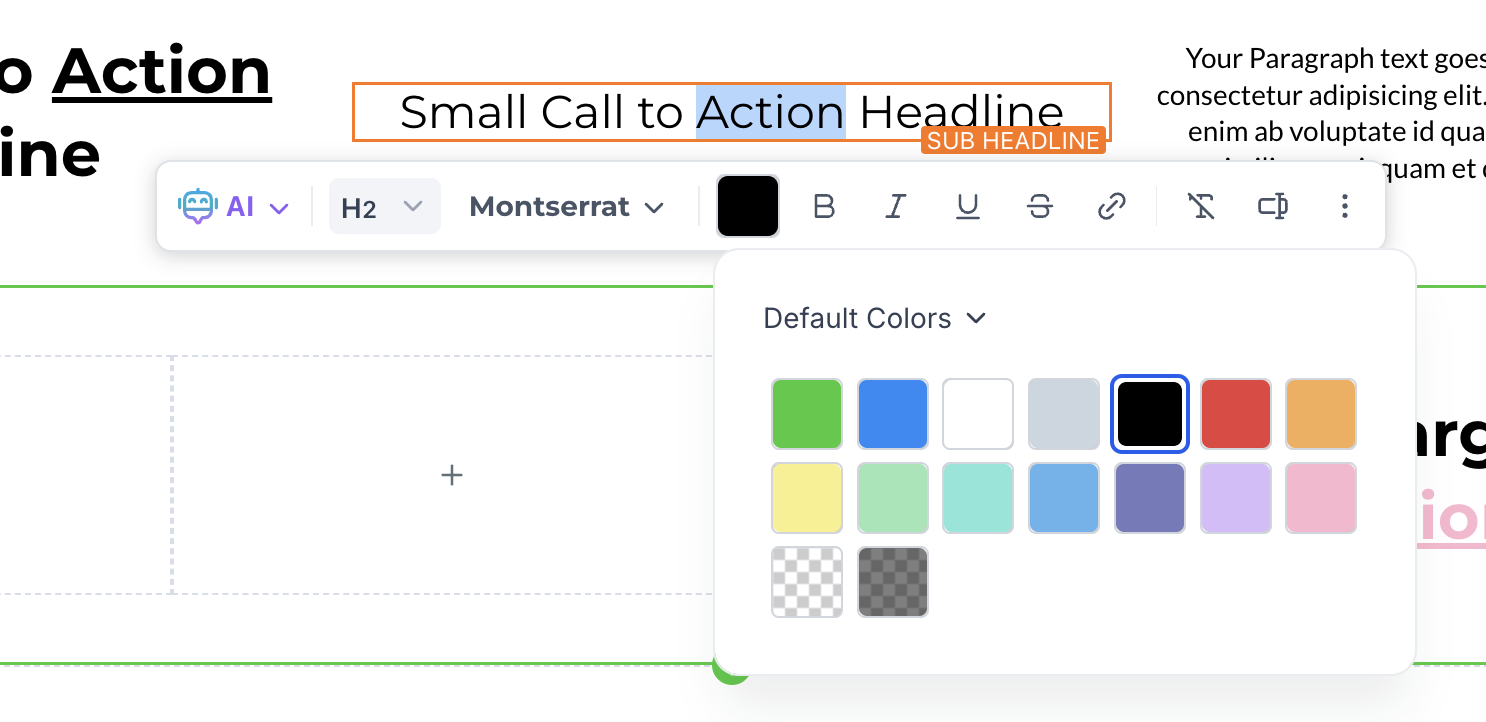
- 🎨Unified Color Palette:We’ve consolidated multiple color options into a single, unified palette. Now, you can customize text colors without needing to switch between settings for bold, headline, underline, or italics — one color picker to rule them all
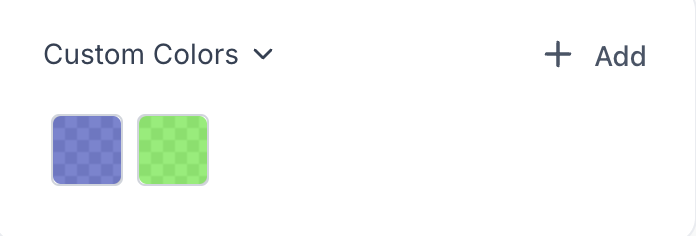
- 🗂️ Default and Custom Colors:The new palette is divided into two sections: Default Colors and Custom Colors. This clear separation allows for easy differentiation between predefined and personalized colors, giving you more control over your design.
- 🖌️ Inline Text Coloring:You can now color selected text directly using the color palette in the inline toolbar, without having to apply the color to the entire block of text.
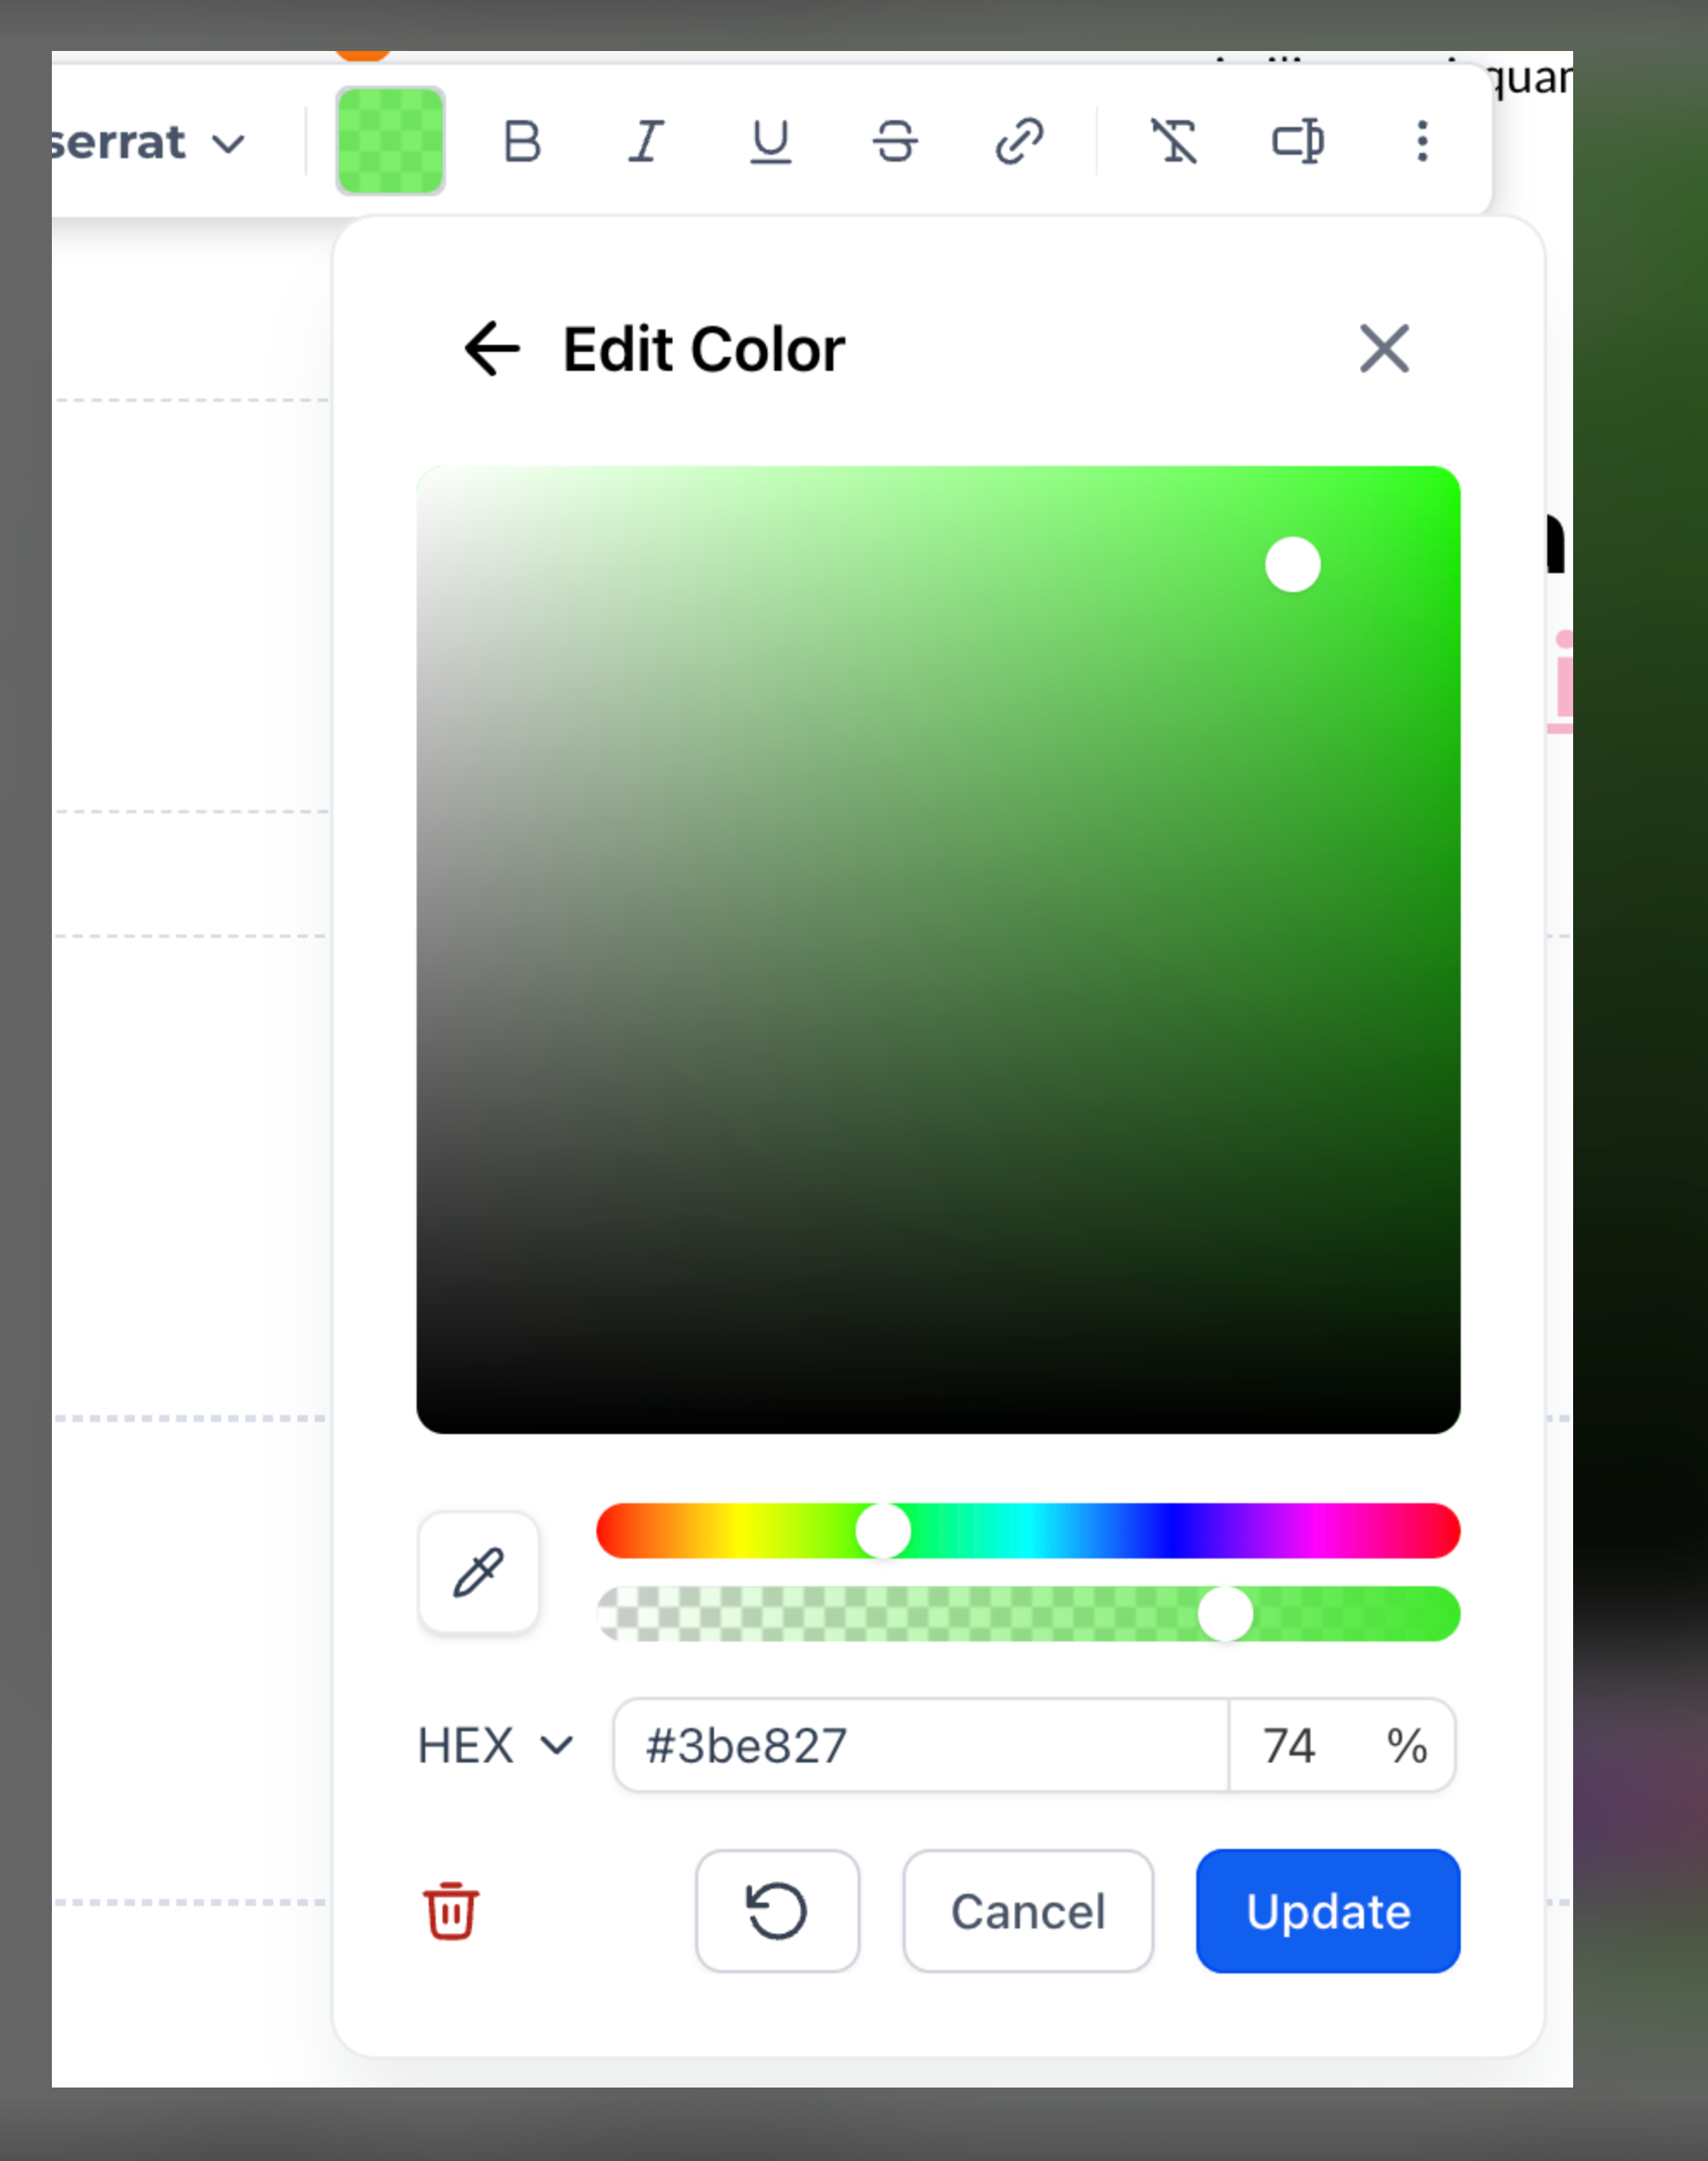
- 🛠️ Custom Color Management: The new color picker UI lets you add, edit, and delete custom colors with ease. Tailor your palette to match your brand’s unique style effortlessly.
- 🖌️ Dropper support:Use dropper to fine tune the colors in your website and funnel.
How to Use:
- Open the funnel or website builder
- Accessing the Color Palette: Either from the right sidebar or when editing text, click on the text color option in the inline toolbar. You’ll see the new unified color palette with sections for Default and Custom Colors.
- Customizing Text Colors: Go to custom color section in the color palette. You can either add a new color or choose a color from the palette and edit it.
- Managing Custom Colors: To add, edit, or delete a custom color, simply open the color picker UI from the Custom Colors section. Use the color selector or input specific hex codes to fine-tune your choices.
Elevate your designs with our new color palette and enjoy a more streamlined, efficient funnel and website creation process! 🌟
Loom link - https://www.loom.com/share/bc04e67bc5c34a82872bb1565c839036?sid=5ca7366b-3a83-4773-9f29-9adf4863ecb9
new
fixed
Memberships
Courses updates
Guess what?
The days of sneaky free access are officially over!No more freeloaders, just pure premium content, right at your fingertips.
Pay. Play. Prosper. Your subscription, your rules!
Check out these sweet upgrades to our already top-notch payment flow!
- Course creators now have the power to pull the plug—cancel the subscription, and access is instantly revoked!
- Your subscription experience just got a sync upgrade! :notes: If it expires on the payments side, and it’s gone here - no loose ends!
- Cancel from the Client Portal? Boom, access disappears like magic!
Here’s the scoop on our latest upgrades -
- Custom Code added in a client portal will get executed in courses if and only if the client portal is enabled in the courses.
- Custom code added in courses will not get executed in mobile devices (Kollab) for client portal enabled locations.
- Custom code added in courses will get executed in legacy web, mobile browser and legacy PWA.
new
Client Portal
Client Portal - Subscription Management is now Live!!
We're thrilled to introduce Subscription Management feature for client portal where user can view and manage their subscriptions, invoices and transactions at one place
What’s New?
- Control for Subscriptions in ClientPortal :money:
Manage all your subscriptions, invoices, and transactions in one convenient location. Whether you’re looking to cancel, review, or filter your subscriptions, everything is just a click away.
- Cancel Subscriptions with Ease
Easily cancel any subscription directly from the management page. No more navigating through multiple screens .
- Canceling a community subscription
revokes access to communities, and canceling a course subscription revokes access to courses.
- Comprehensive Invoice Management
View and download your invoices at any time. Whether you need to check billing details, payment history, or transaction summaries, you have full access.
- Filter by Source, Status, and Date
Use advanced filtering options to quickly find subscriptions and transactions based on their source, status, or a specific date range. This helps you stay organised and ensures you have a clear overview of your billing history.
- Revamped Settings Page with Enhanced UI Design
Enjoy a refreshed, user-friendly design on the settings page for a more intuitive experience with improved accessibility and a cleaner interface that makes managing your account simpler than ever.
- Subscriptions View Permission
If admins doesn't want there users to see Subscriptions Management it can be also revoke through app permissions
- Profile Picture Crop
Easily crop and adjust your profile photo for the perfect fit in profile page
Bug Fixes:
Characters limitation in the password fields on set-password and signup pages are fixed
Blank Screen issue when login to Client-portal for admins fixed
Load More
→